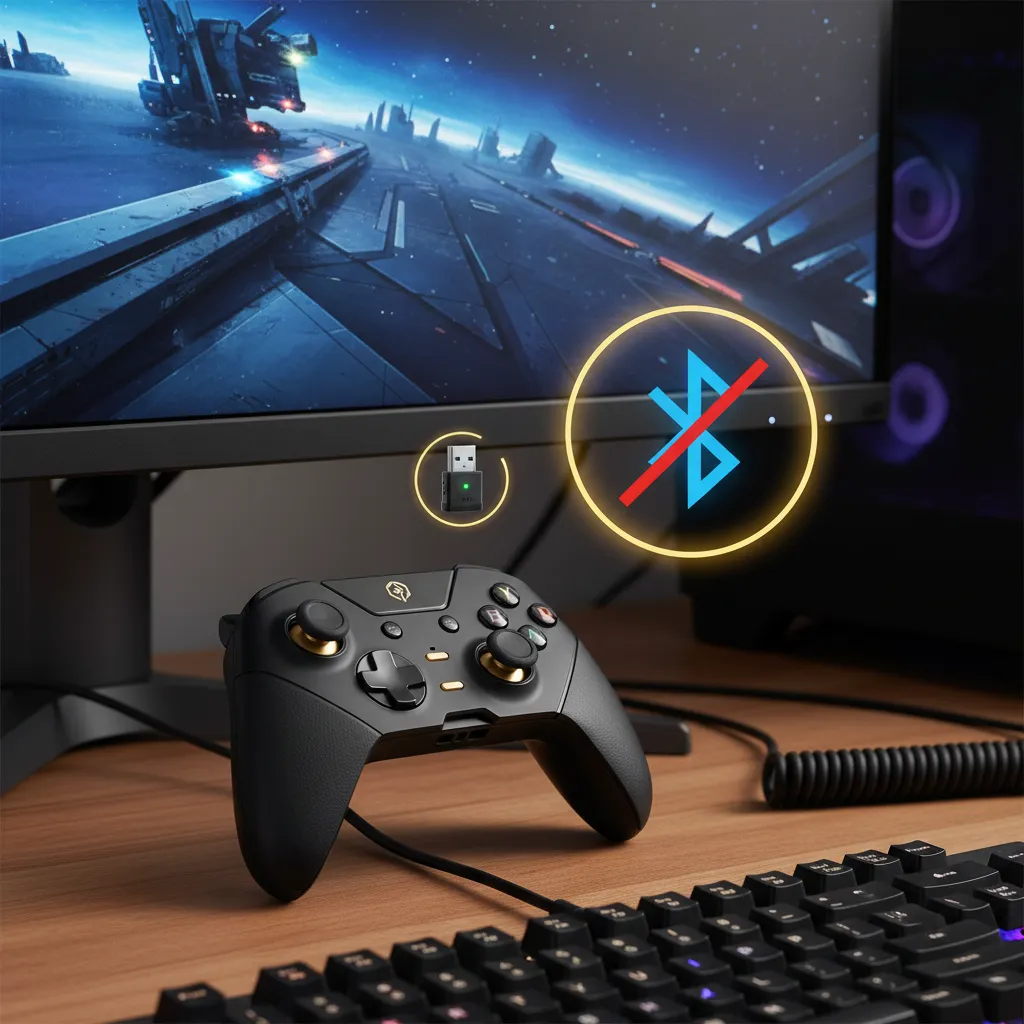
Lost your Flydigi Apex 2 dongle? No sweat!
You do not need it to get back in the action on your PC.
This guide shows you exactly how to connect your controller using a standard Bluetooth connection.
It is quick, easy, and will have you dominating your favorite games in no time.
Let’s level up your controller knowledge and get you back in the game, wire-free!
TL;DR
- You can connect the Flydigi Apex 2 to a PC without the official dongle using either a standard Bluetooth connection or a wired USB-C cable.
- Connecting without the dongle results in higher input latency and the loss of access to proprietary Flashplay technology, which is not ideal for competitive gaming.
- Advanced features like full motion control (gyro), advanced haptic feedback, and full customization via the Flydigi PC Space Station software are limited or unavailable without the dongle.
Understanding Flydigi Apex 2 PC Limitations Without the Official Dongle
The Flydigi Apex 2 is a powerhouse, but it’s designed to work best with its official 2.4GHz USB dongle. This dongle enables Flydigi’s proprietary Flashplay technology, ensuring ultra-low latency. Without it, you’re not out of luck, but you will face some trade-offs.
When you connect via standard Bluetooth or a wired USB cable, the controller defaults to more generic input modes.
This means you lose access to some of the advanced features that make the Apex 2 unique.
Let’s break down exactly what changes.
Feature Comparison: Dongle vs. No Dongle
Understanding the differences is key to managing your expectations.
While the core functions remain, the specialized hardware benefits are tied to the dongle.
Here’s a quick look at what you gain and lose.
| Feature | With Official Dongle (Flashplay) | Without Dongle (Bluetooth/Wired) |
|---|---|---|
| Input Latency | ✅ Ultra-Low | ❌ Higher / Standard |
| Motion Controls (Gyro) | ✅ Full Support | ❌ Limited or No Support |
| Advanced Vibration | ✅ Full Haptic Feedback | ❌ Standard Rumble Only |
| Flydigi PC Space Station | ✅ Full Customization | ❌ Limited Recognition |
| Connection Stability | ✅ Highly Stable | ❌ Prone to Interference |
The Impact of Higher Latency
The most significant limitation is increased input lag.
The official dongle provides a near-instant connection, which is critical for competitive gaming.
A standard Bluetooth connection, while convenient, introduces a noticeable delay between your action and the on-screen response.
A bar chart comparing average wireless input latency, showing Standard Bluetooth at 8ms and a Proprietary 2.4GHz Dongle at 3ms.
This delay might not be an issue for casual or turn-based games. However, in fast-paced shooters or fighting games, those few milliseconds can make all the difference.
For more insight, check out our guide on low latency controllers.
“For competitive gamers, especially those in the esports scene, minimizing input lag is paramount. A difference of a few milliseconds can be the deciding factor between winning and losing a match.”– BenQ Knowledge Center
Reduced Functionality and Customization
Beyond latency, you’ll also lose access to the full suite of customization options. The Flydigi PC Space Station software may not properly recognize the controller without the dongle, preventing you from remapping buttons, adjusting deadzones, or fine-tuning the motion controls.
The advanced haptic feedback might also revert to a standard rumble or might not work at all.
Before you start playing, it is a great idea to verify your connection quality. You can use our Gamepad Latency Test to see how your setup performs.
Fast Facts
- Using the Flydigi Apex 2 without its official 2.4GHz USB dongle significantly increases input latency, moving from ultra-low (3ms) to higher standard Bluetooth latency (8ms), which can hinder competitive gaming.
- Without the official dongle, the controller loses access to critical advanced features like full motion control (gyro), advanced haptic feedback, and comprehensive customization through the Flydigi PC Space Station software.
- Connecting via standard Bluetooth or wired USB without the dongle results in limited functionality and potentially less stable connections, as the controller defaults to generic input modes rather than Flydigi’s proprietary Flashplay technology.
Connecting Flydigi Apex 2 to PC: Advanced Bluetooth & Wired USB-C Setup
Don’t have the official Flydigi dongle? No problem!
Your Apex 2 is a versatile gamepad with excellent built-in connectivity options. Let’s get you back in the game using Bluetooth or a simple wired connection.
Fast Facts
- The Flydigi Apex 2 gamepad can be connected to a PC without needing the official Flydigi dongle.
- Users have two primary options for connecting the Apex 2 to a PC: via built-in Bluetooth or a wired USB-C connection.
Pairing Your Apex 2 via Bluetooth
Connecting wirelessly via Bluetooth is perfect for a clean, cord-free setup.
Your PC needs to have Bluetooth capability for this to work. Most modern laptops and many motherboards include it.
Follow these simple steps to get paired and ready to play:
- Power off your Flydigi Apex 2 controller completely.
- Press and hold the X button + Home (Logo) button simultaneously for a few seconds. The indicator lights should start flashing quickly, signaling it’s in pairing mode for PC (XInput).
- On your Windows PC, go to Settings > Bluetooth & devices (or just “Devices” on Windows 10).
- Click on “Add device” and then select “Bluetooth” from the pop-up menu.
- Your PC will search for nearby devices. Select “Flydigi Apex 2” from the list to complete the pairing process.
Once connected, Windows will automatically configure it as a standard XInput device, making it compatible with the vast majority of modern PC games.
“All developers are encouraged to use XInput for gamepad input. XInput is easier to use than DirectInput and is compatible with all versions of Windows…”– Microsoft
Fast Facts
- To pair the Flydigi Apex 2 controller, ensure your PC has Bluetooth capability.
- Initiate pairing mode by powering off the controller, then holding the X and Home buttons simultaneously until the indicator lights flash quickly.
- On your Windows PC, go to Bluetooth settings, add a new device, and select “Flydigi Apex 2” to connect it as an XInput device for broad game compatibility.
Connecting with a Wired USB-C Cable
For the absolute lowest latency and a connection that never needs charging, the wired method is your best bet. It’s the simplest way to connect your controller and is ideal for competitive gaming.
Simply plug one end of a USB-C cable into your Apex 2 and the other end into an available USB port on your PC. Windows will instantly recognize the controller and install any necessary drivers.
It’s true plug-and-play!
Verify Your Connection
After connecting with either method, it’s crucial to confirm everything is working perfectly.
Head over to our main Gamepad Controller Test to check all your buttons, triggers, and analog sticks.
This ensures every input is registered correctly before you launch your game.
Optimizing Bluetooth for Flydigi Apex 2 on Windows
Getting your Flydigi Apex 2 connected via Bluetooth is a great first step!
Now, let’s make sure that connection is rock-solid for gaming. A poor Bluetooth signal can lead to input lag or random disconnects, which is the last thing you want mid-match.
Optimizing your wireless setup can make a world of difference. A few tweaks to your Windows settings and environment can ensure a stable, low-latency connection.
Let’s level up your wireless performance.
Key Steps for a Stable Bluetooth Connection
Follow these steps to minimize interference and strengthen your controller’s signal. A smooth connection means more responsive gameplay.
- Update Your Drivers: Go to your PC or motherboard manufacturer’s website and download the latest Bluetooth drivers. Outdated drivers are a common cause of connectivity issues.
- Minimize Obstructions: Ensure a clear line of sight between your PC’s Bluetooth adapter and your Apex 2. Desks, walls, and even your own body can weaken the signal.
- Reduce 2.4 GHz Interference: Many devices use the 2.4 GHz band, including Wi-Fi routers, microwaves, and other wireless peripherals. Try to move these devices away from your PC and controller.
- Check Power Settings: Windows sometimes tries to save power by turning off the Bluetooth adapter. You can prevent this by going to Device Manager, finding your Bluetooth adapter’s properties, and unchecking “Allow the computer to turn off this device to save power” in the Power Management tab.
“To ensure the best possible user experience, it’s critical to ensure the Bluetooth radio is functional and has the latest firmware and driver updates from the system or device manufacturer.”– Microsoft, Bluetooth Best Practices
Once you’ve optimized your setup, it’s time to verify the results.
A stable connection is crucial, but you also want to confirm your inputs are registering perfectly. This is where testing comes in.
Head over to our main Gamepad Controller Test to check all your buttons, triggers, and analog sticks.
To see if your optimization efforts paid off, run our Gamepad Latency Test to measure your wireless input lag.
Let’s get you back in the game with confidence!
Wired USB-C: Ensuring Driver & System Compatibility
The simplest and most reliable way to connect your Flydigi Apex 2 is with a direct wired connection. This method eliminates pairing issues and potential interference.
Wired connections typically offer the lowest latency, which is critical for competitive gaming.
Getting set up is incredibly straightforward. Let’s walk through the steps to get you back in the game with a stable, high-performance connection.
- Grab a high-quality USB-C to USB-A cable. The one that came with your controller or a reputable third-party cable will work perfectly.
- Plug the USB-C end into your Flydigi Apex 2 and the USB-A end into an available port on your PC.
- Windows should automatically detect the controller. You’ll likely hear the familiar device connection sound as it installs the necessary XInput drivers.
Once connected, your PC will recognize the Apex 2 as a standard Xbox controller.
This ensures maximum compatibility with thousands of PC games right out of the box, with no extra software needed for most titles.
Now you’re ready to play!
Troubleshooting a Wired Connection
If your PC doesn’t recognize the controller, don’t worry. These simple checks can often solve the problem. A faulty connection is usually the culprit.
- Try a Different USB Port: Sometimes a USB port can be faulty. Try plugging the controller into another port, preferably one directly on your motherboard.
- Check Your Cable: Ensure your USB-C cable is not just for charging but also supports data transfer. A damaged cable can also cause connection issues.
- Verify in Device Manager: Open the Windows Device Manager and look under “Human Interface Devices” or “Xbox Peripherals.” If you see an error, try updating the driver.
“The result is a port that’s not only easier to plug your cables into, but also one that can carry data faster and power more capable devices.”– Matthew Buzzi, PCMag
After successfully connecting, it’s a great idea to verify that all buttons, triggers, and analog sticks are working correctly.
You can run a quick check with our Gamepad Drift Test to ensure your setup is perfect before launching a game.
Fast Facts
- The wired USB-C connection is the simplest, most reliable, and lowest-latency method for the Flydigi Apex 2, offering a plug-and-play experience ideal for competitive gaming.
- For a stable and low-latency Bluetooth connection, it is crucial to optimize your Windows setup by updating drivers, minimizing physical obstructions, reducing 2.4 GHz interference, and disabling power-saving features for the Bluetooth adapter.
- Regardless of the connection method (wired or Bluetooth), always verify the controller’s functionality, including all buttons, triggers, analog sticks, and input latency, using a dedicated gamepad controller test to ensure optimal performance.
Enhancing Flydigi Apex 2 Performance: Third-Party Solutions & PC Settings
Getting your Flydigi Apex 2 connected via Bluetooth is a great start. Now, let’s unlock its full potential.
The default Windows connection can sometimes lack features or have compatibility issues. Third-party software is key to a better experience.
Unleash Your Controller with Steam Input
Steam has a powerful, built-in controller configurator called Steam Input. It acts as a translation layer, making almost any controller compatible with thousands of games.
It’s often the best solution for the Flydigi Apex 2 on PC.
First, ensure your controller works in Steam by adding it through the settings.
This tool allows you to remap any button, adjust analog stick sensitivity, and create custom profiles for different games. It can even emulate keyboard and mouse inputs.
For games outside of Steam, you can add them as a “Non-Steam Game” to your library. This allows you to launch them through Steam and use its controller overlay.
This simple trick extends compatibility to nearly your entire game library.
Advanced Customization with Third-Party Mappers
For gamers who demand ultimate control, dedicated software like reWASD offers even deeper customization.
These tools can manage multiple profiles, create complex macros, and fine-tune every aspect of your gamepad’s performance, often beyond Steam’s capabilities.
“The main idea behind rewasd is to give a gamer as much freedom as possible. Not just to remap buttons, but to create a completely new controller.”– Mary G, PCGamesN
Optimizing Your PC for a Stable Connection
Software is only half the battle. Your PC settings can make a huge difference in performance, especially regarding latency and stability.
Let’s get your system primed for gaming.
- Update Your Bluetooth Drivers: Go to your motherboard or Bluetooth adapter manufacturer’s website. Download and install the latest drivers directly from them, not just through Windows Update. This is a common fix for connectivity problems.
- Adjust Power Settings: Windows sometimes tries to save power by limiting USB devices, which can include your Bluetooth adapter. Go to your Power Plan settings and select ‘High Performance’ to prevent this.
- Minimize Wireless Interference: Keep other wireless devices, like routers or cordless phones, away from your PC and controller. Physical obstructions like desks or walls can also weaken the signal.
- Calibrate in Windows: Before launching a game, type “Set up USB game controllers” into the Windows search bar. Select your Apex 2, go to Properties, and use the calibration tool to ensure all axes and buttons are correctly registered.
Test Your Setup for Peak Performance
After making these adjustments, it’s crucial to test your controller’s performance.
You want to ensure your inputs are responsive and accurate.
Check for any lingering issues like inaccurate analog sticks or unresponsive buttons.
A great way to verify your calibration is with our Gamepad Drift Test tool. It helps you visually confirm that your sticks are perfectly centered and not registering unwanted input.
You can also use the Controller Vibration Test to ensure haptics are working correctly through your new setup.
Fast Facts
- Utilize third-party software like Steam Input or dedicated mappers (e.g., reWASD) to unlock full customization, remapping, and broader game compatibility for your Flydigi Apex 2 controller.
- Optimize your PC’s settings by updating Bluetooth drivers, setting power plans to ‘High Performance,’ minimizing wireless interference, and calibrating the controller in Windows to ensure a stable connection and reduced latency.
- After making adjustments, thoroughly test your controller’s performance using tools like the Gamepad Drift Test to verify input accuracy and responsiveness.
Conclusion
You’re now ready to connect your Flydigi Apex 2, dongle or not! Connecting via Bluetooth or a wired connection is a solid backup plan for many games.
Remember the trade-offs: higher latency and fewer features. For casual play, it’s great. For competitive action, the dongle is king.
Use this knowledge to choose the right setup for your session. Now, let’s get you back in the game and grab that win!
Frequently Asked Questions
Can I use the Flydigi PC Space Station without the dongle?
Functionality will be very limited. The software needs the dongle to unlock the Apex 2’s full customization and advanced features.
Will the gyro motion controls work over Bluetooth?
Unfortunately, no. The gyro controls are tied to Flydigi’s proprietary Flashplay mode, which requires the official 2.4GHz dongle to function.
Is it worth buying a replacement Flydigi dongle?
Yes, absolutely! To unlock the ultra-low latency, motion controls, and custom settings, getting an official dongle is the best way to go.
Wired or Bluetooth: which is better without the dongle?
A wired USB connection is your best bet. It offers a more stable signal and slightly lower latency than a standard Bluetooth connection.
Technical Glossary
- Flashplay Technology
- A proprietary technology from Flydigi, enabled by the official 2.4GHz USB dongle, that ensures an ultra-low latency wireless connection for gaming controllers.
- Input Latency
- The delay between a user’s physical action on a controller and the corresponding response appearing on-screen. Lower values are critical for fast-paced and competitive gaming.
- 2.4GHz USB Dongle
- A dedicated hardware receiver that plugs into a USB port to create a stable, high-speed wireless connection, often providing lower latency and more stability than standard Bluetooth.
- Haptic Feedback
- An advanced form of vibration technology that provides more nuanced and detailed tactile sensations to the user, as opposed to the simpler, uniform vibration of standard rumble.
- Motion Controls (Gyro)
- A controller feature utilizing an internal gyroscope to track the device’s physical movement and orientation, allowing players to aim or steer by tilting and moving the controller.


