Is a mushy shoulder button ruining your killstreak? Don’t bench your controller just yet!
A worn-out spring is a common issue, but it’s also one of the easiest DIY repairs to tackle. We’ll walk you through swapping that faulty part to restore the crisp, responsive click you need.
Grab your screwdriver and let’s level up your hardware knowledge to get you back in the game!
TL;DR
- Diagnose broken springs by identifying floppy triggers that offer zero resistance.
- Gather essential precision tools like T8 Security or PH00 screwdrivers before starting.
- Follow step-by-step disassembly instructions for accessing PS5 and Xbox trigger modules.
- Clean internal contact pads during the repair to prevent future button stickiness.
Diagnosing Floppy Triggers and Gathering Essential Tools
Before you start unscrewing the casing, you must confirm that the spring is the actual culprit. A broken spring creates a very distinct physical sensation.
The trigger will feel “floppy” and offer zero resistance when pressed. It often fails to snap back to its neutral position, hanging loosely in the housing.
To verify this electronically, connect your device and run the trigger pressure test on our website. Watch the axis values closely.
If the value jitters or refuses to return to zero when you release the trigger, the mechanical tension spring has snapped or dislodged. It needs replacement.
A pie chart showing common controller failures: Stick Drift (45%), Trigger/Spring Issues (25%), Button Sticking (15%), and Port/Connectivity (15%).
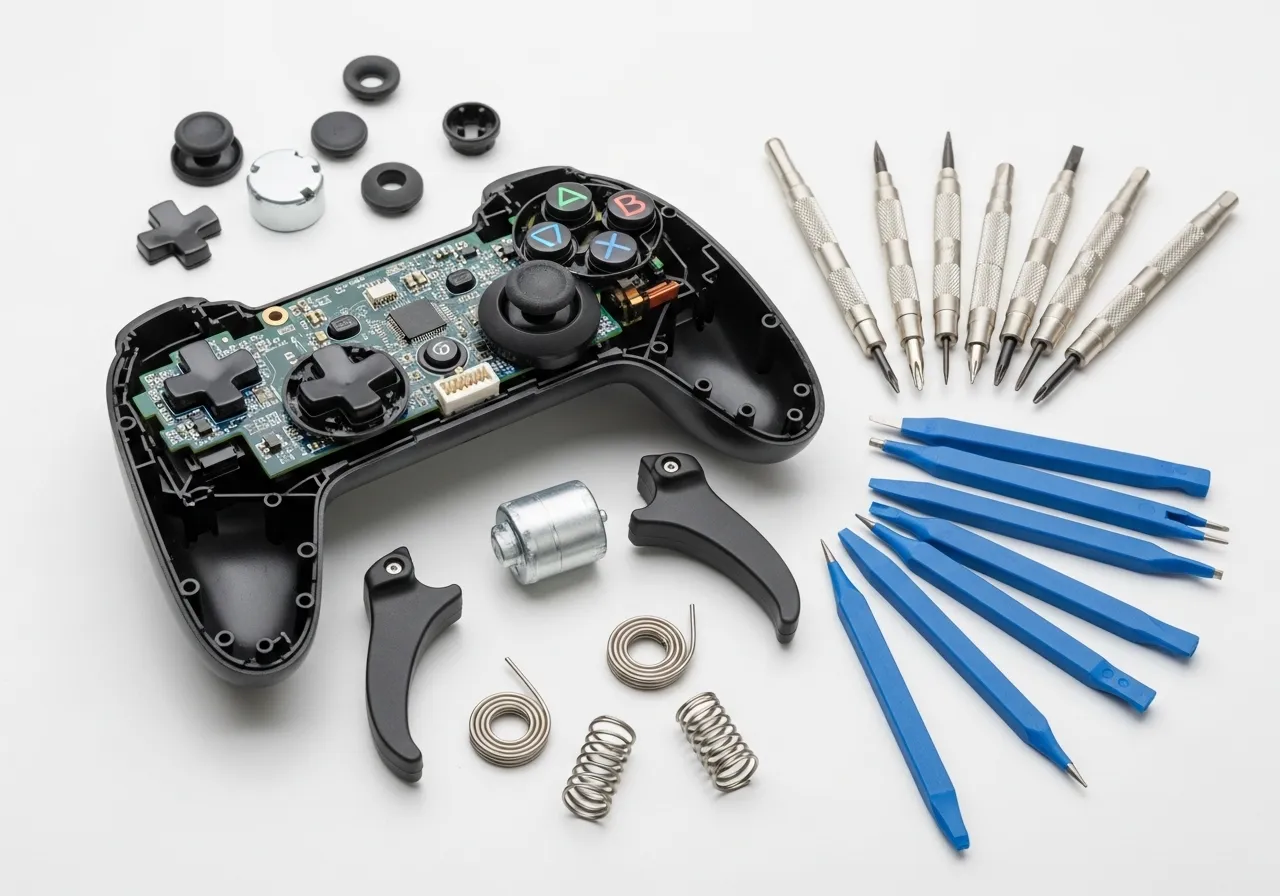
Gathering Your Repair Toolkit
Attempting a controller shoulder button spring replacement with makeshift tools is a recipe for disaster. Using the wrong screwdriver will strip the screws.
You do not need an expensive workshop, but a few precision tools are non-negotiable. The specific screwdriver type depends on your controller model.
“The right tool for the job makes all the difference. Using a kitchen knife to open electronics is the quickest way to destroy them.”– Kyle Wiens, iFixit CEO
Below is a checklist of the essential equipment you will need to perform this repair safely and effectively.
| Tool Name | Specific Use | Compatibility Note |
|---|---|---|
| Precision Driver | Removing shell screws | T8 Security (Xbox) or PH00 (PlayStation) |
| Plastic Spudger | Prying open clips | Prevents scratching the plastic shell |
| Angled Tweezers | Placing the spring | Essential for fine motor work |
| Replacement Springs | Restoring tension | Verify your specific controller model |
While you have the controller dismantled, it is also the perfect opportunity to clean the internal contact pads.
This simple maintenance step can help you prevent controller buttons from becoming mushy in the future.
Once you have these tools laid out and your replacement parts ready, you are prepared to open the shell. Let’s proceed to the teardown.
Fast Facts
- Diagnose a broken spring by identifying a ‘floppy’ trigger that offers zero resistance or by observing jittering axis values during a trigger pressure test.
- Avoid damaging the controller by using essential precision tools, including a model-specific screwdriver (T8 or PH00), plastic spudger, and angled tweezers.
- Utilize the disassembly process as an opportunity to clean internal contact pads to prevent buttons from becoming mushy in the future.
Disassembly Guide: Accessing PS5 and Xbox Series Trigger Modules
Opening your controller can feel daunting. However, reaching the trigger assembly is a standard process for any hardware enthusiast. You can do this.
Before grabbing a screwdriver, verify that debris isn’t the true culprit. Sometimes, dirt mimics a broken spring.
If you haven’t already, check our guide on how to fix sticky controller buttons without taking it apart. If the issue persists, let’s proceed with the repair.
Essential Tools for Disassembly
Having the correct tools prevents stripped screws and damaged plastic. Do not use a kitchen knife or incorrect driver sizes. Here is your loadout.
- Phillips #00 Screwdriver: Required for PS5 DualSense internals and shell screws.
- Torx T8 Security Screwdriver: Essential for Xbox controllers. A standard T8 will not work due to the security pin.
- Spudger (Plastic Pry Tool): Used to separate shell clips without gouging the plastic casing.
- Tweezers: Helpful for handling small screws and unhooking the old spring.
“The DualSense is a lot harder to take apart than the DualShock 4… It’s packed with haptic feedback motors and trigger resistance gears.”– Cameron Faulkner, The Verge
Disassembling the PS5 DualSense
The DualSense hides its screws cleverly. You must remove the black trim piece first. Use your pry tool to gently lift the trim near the grips.
Once the trim is removed, you will expose two screws near the bottom handles. There are also two screws hidden under the L1 and R1 buttons.
- Remove L1/R1: Slide your pry tool under the bumper button. Gently pop it outward to reveal the hidden screw underneath.
- Remove Shell Screws: Unscrew the four anchor screws (two bottom, two top). Keep these safe in a tray.
- Open the Shell: Start prying from the headphone jack area. Release the clips along the side seams carefully.
- Battery Access: Lift the rear case. Disconnect the battery immediately to prevent shorts.
- Locate Trigger Module: The trigger module is now visible at the top. You will see the gear mechanism and the spring location.
Disassembling the Xbox Series X|S Controller
Microsoft uses a different architecture. The screws are hidden behind the side grip panels and the battery compartment sticker.
If you enjoy customizing your hardware, this process is identical to our DIY custom shell swap guide for Xbox Series X controller.
- Remove Side Grips: These are held by clips, not screws. Pry firmly from the seam where the grip meets the faceplate.
- Locate Hidden Screws: You will find one screw behind each grip. The fifth screw is hidden under the battery label.
- Unscrew: Use your T8 Security driver. Remove all five screws. The faceplate will now lift off easily.
- Access Triggers: The rumble motors and trigger assembly are attached to the main chassis. You now have clear access.
Fastener Comparison Guide
Knowing exactly what holds your controller together helps you prepare. This table outlines the differences between the two major platforms.
| Feature | PS5 DualSense | Xbox Series X|S |
|---|---|---|
| Primary Screw Type | Phillips #00 | Torx T8 Security |
| Hidden Screw Count | 4 (Under trim & buttons) | 5 (Under grips & battery) |
| Shell Separation | Requires prying clips | Falls apart after unscrewing |
| Trigger Module | Modular block (Complex) | Integrated into chassis |
With the shell open and the battery disconnected, you are ready to target the faulty component. The next step involves the actual spring exchange.
Step-by-Step Housing Removal and Bracket Exposure
Opening up your controller is the first major hurdle in this repair. It feels daunting, but with a steady hand, you can dismantle the housing safely.
Start by locating all visible screws on the rear of the gamepad. Remember that manufacturers often hide screws under stickers or within the battery bay.
“Prying open the handles requires a fair bit of force, and it feels like you might break them. But they do pop off eventually.”– Sarah Jacobsson Purewal, Tom’s Hardware DualSense Teardown
Once the screws are out, you need to separate the front and back faceplates. Do not use a metal screwdriver for this, as it will gouge the plastic.
Use a plastic pry tool or a guitar pick to work your way around the seam. Listen for the satisfying “pop” of the internal clips releasing their grip.
If you are working specifically on Microsoft hardware, our DIY Custom Shell Swap Guide for Xbox Series X Controller details the exact clip locations for those models.
Disassembly Checklist
- Remove Grips: Detach any side rails or rubberized grips that cover hidden screws.
- Unscrew: Remove all securing screws using the correct driver bit (usually TR8 or Phillips #00).
- Separate: Gently pry the shell apart, starting near the headphone jack or charging port.
- Disconnect: Carefully detach any ribbon cables connecting the front and back halves.
- Expose: Locate the plastic bracket mechanism that houses the shoulder buttons.
Be extremely careful when separating the two halves of the controller housing. Ribbon cables are often short and can tear if you pull them apart too fast.
Once the shell is removed, you will see the internal plastic bracket. This skeleton holds the mainboard and, crucially, the trigger modules you need.
A bar chart showing repairability scores out of 10: Switch Pro (8), Xbox Series X (7), DualSense (6), and Elite Series 2 (4).
You may need to remove a few more screws to free the bracket from the mainboard. Keep these screws organized, as they are often different sizes.
With the bracket exposed, you now have clear access to the shoulder button assembly. You are ready to locate the faulty spring mechanism.
The Critical Re-Seat: Macro Techniques for Spring Alignment
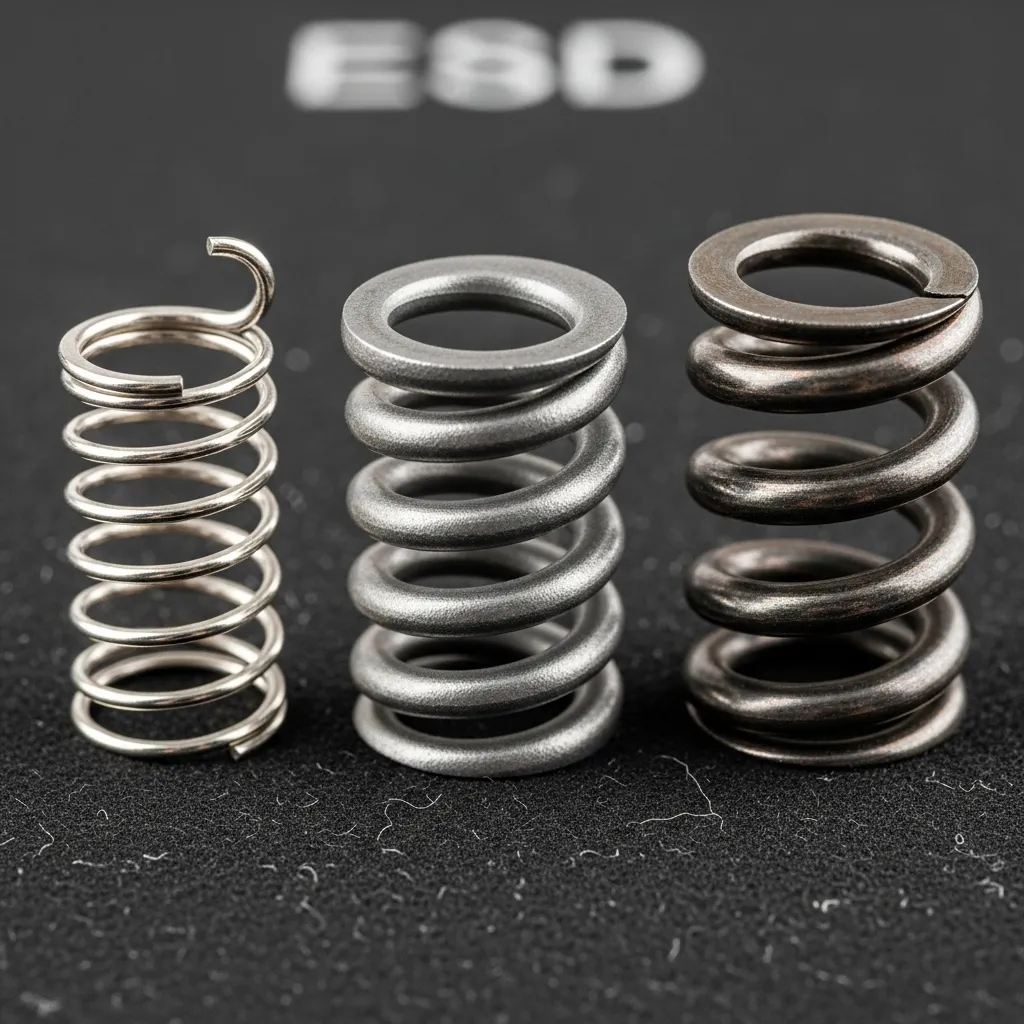
Aligning the spring is a test of dexterity. The spring has two legs, and they must push against opposing surfaces to create the necessary recoil.
If you rush this step, the spring might eject across the room. We call this the “launch risk,” and it is the most common frustration in this repair.
“The springs in the trigger mechanism are under tension and can easily fly out when the housing is opened. Work slowly and keep a magnet handy.”– WikiHow Staff, How to Take Apart a PS4 Controller
To ensure a perfect seat, you must identify the “anchor point” inside the button housing. This is usually a small notch designed to hold the short leg.
Use fine-tipped tweezers to hold the spring by its coil. Place the short leg into the button’s notch first, as this provides a stable pivot point.
Step-by-Step Seating Procedure
- Anchor the Base: Insert the short leg of the spring into the small plastic slot within the shoulder button itself.
- Compress the Coil: Gently squeeze the spring legs together using your tweezers to build tension without releasing it.
- Slide and Align: While compressed, slide the button onto the controller chassis rail until the hinge holes line up perfectly.
- Insert the Pin: Quickly push the metal support pin or clip through the hinge to lock the mechanism in place.
A bar chart showing that lost springs account for 45% of common DIY repair mishaps, followed by broken clips at 25%.
Once the pin is in, test the movement immediately. The button should snap back instantly when released. If it feels sluggish, the spring is misaligned.
If the return action feels weak or “mushy” immediately after installation, do not force it. You likely need to reset the spring orientation.
Sometimes, debris or a pinched rubber pad can mimic a bad spring.
If the button sticks, check our guide on how to fix sticky controller buttons without taking it apart for troubleshooting.
After reassembly, precise validation is key. You should verify the input consistency using the controller trigger pressure test to ensure full range of motion.
Fast Facts
- You need specific tools for each controller: a Phillips #00 screwdriver is required for the PS5 DualSense, while the Xbox Series X|S demands a Torx T8 Security driver.
- Disassembling the PS5 DualSense is complex, involving the removal of the black trim and L1/R1 buttons to reveal hidden screws before carefully prying the shell clips.
- The Xbox Series X|S architecture relies on five screws hidden behind the side grips and battery label; once removed, the faceplate lifts off easily to expose the internal components.
Aftermarket vs. OEM Springs: Comparing Tension and Feel
Choosing between OEM (Original Equipment Manufacturer) springs and aftermarket alternatives is the first step in your repair journey.
This decision affects how your controller responds.
Factory springs are designed to offer a balanced experience. They provide enough resistance to prevent accidental presses but remain light enough for comfort.
The Case for OEM Springs
If you want your controller to feel exactly like it did out of the box, OEM replacements are the way to go.
They maintain the standard tension curve developers expect.
Most games are tuned for this specific resistance. Using factory-standard springs ensures that haptic feedback and trigger pulls align with gameplay design intent.
“The controller is the primary point of interaction… and the tactility of the buttons and triggers is crucial to the experience.”– Richard Leadbetter, Eurogamer (Digital Foundry)
Aftermarket Springs: Customizing the Feel
Third-party springs offer variety.
You can find “performance” springs that are significantly stiffer than stock components. These are popular in the competitive scene.
Higher tension means the shoulder button snaps back to its neutral position faster.
This creates a responsive feel that is ideal for rapid-fire inputs in shooters.
If you are also interested in shortening the travel distance of your inputs, check out our custom controller trigger stop installation guide.
A bar chart comparing the gram force required for different spring types: Soft (45g), OEM (65g), and Stiff (90g).
Tension vs. Fatigue
While stiffer springs improve reset times, they require more force to actuate. This can lead to hand fatigue during long gaming sessions, known as “gamer’s thumb.”
Conversely, softer aftermarket springs can make the buttons feel mushy or slow. It is vital to find a balance that suits your hand strength and gaming style.
Before installing new springs, you should check your current button status.
Run a quick check on the controller haptic actuators test to establish a baseline.
If your buttons currently feel inconsistent or soft regardless of the spring, reviewing how to prevent controller buttons from becoming mushy can save you future headaches.
Key Factors to Consider
- Return Rate: Stiff springs return the button to position zero faster, reducing the “deadzone” time between clicks.
- Material Quality: Cheap aftermarket springs may lose tension quickly. Look for high-grade steel or coated variants.
- Noise Level: Stiffer tension often results in a louder “clack” when the button snaps back.
Fast Facts
- OEM springs are the best choice for users seeking to restore the controller’s original, balanced feel that aligns with game developers’ intended design.
- Aftermarket springs offer customization options, such as stiff ‘performance’ springs that provide faster reset times for competitive play at the cost of potential hand fatigue.
- Selecting the right spring involves balancing responsiveness with comfort, while also considering factors like material quality and the noise level of the button return.
Conclusion
Fixing a broken spring isn’t just about saving cash. It is about taking ownership of your gaming gear.
You have identified the floppy trigger issue and gathered the right tools. With that new spring installed, your reaction times will be sharper.
Don’t let a cheap part keep you on the sidelines. Enjoy that crisp, responsive click again!
Frequently Asked Questions
Do I need to solder the new spring?
Not at all! This is a purely mechanical repair. You only need a screwdriver and tweezers to swap the part.
Are Xbox and PlayStation springs interchangeable?
No, they are not compatible. Each controller uses a specific spring shape. Always double-check your model number before buying.
Can I use a spring from a ballpoint pen?
We strongly advise against this. Pen springs lack the correct tension. Your trigger will feel “off” and may not reset properly.
How long does this repair take?
First-timers usually finish in about 30 minutes. Once you know the steps, you can swap a spring in under 15 minutes.
Technical Glossary
- Gamepad Trigger Pressure Test
- A diagnostic method used to electronically verify a broken spring by monitoring axis values for jittering or failure to return to zero.
- Axis values
- Digital readings observed during testing that indicate the position of the trigger; irregular readings suggest a snapped or dislodged spring.
- Mechanical tension spring
- The internal component that provides physical resistance to the trigger and snaps it back to a neutral position.
- Plastic Spudger
- A tool used for prying open casing clips safely to prevent scratching the plastic shell of the controller.
- Internal contact pads
- Electronic components inside the controller that can be cleaned during disassembly to prevent buttons from feeling mushy.


