Ready to fire faster and gain that competitive edge? Installing custom trigger stops is the secret weapon you need for FPS dominance.
Whether you’re a casual player or a pro, this guide makes modding your hardware simple. We’ll cut through the jargon with easy, safe steps to upgrade your setup.
Grab your tools and let’s level up your controller knowledge so you can get back in the game with a serious advantage!
TL;DR
- Internal trigger stops reduce button travel distance from roughly 7mm to 2mm, significantly improving reaction times in competitive games.
- Essential tools include T8 Security and T6 bits for Xbox, a PH00 bit for PlayStation, and plastic pry tools to prevent shell damage.
- Installation requires careful disassembly, involving the removal of delicate faceplates on PS5 and side grips on Xbox Series X controllers.
Pre-Installation: Tools Required and Kit Difficulty Assessment
Before you start prying open your favorite gamepad, it is crucial to understand what you are getting into. Installation methods vary widely.
External trigger stops usually just clip onto the existing buttons, requiring zero tools. Internal modifications, however, are a different beast.
If you plan to install an internal kit, you will need to open the controller shell. This requires steady hands and specific screwdrivers.
Assessing the Difficulty Level
For most gamers, an internal installation is a moderate challenge. It involves handling small screws, delicate ribbon cables, and plastic clips.
If you have previously followed our DIY Custom Shell Swap Guide for Xbox Series X Controller, you are already prepared. The process is nearly identical.
A bar chart showing that standard triggers travel about 7mm, while trigger stops reduce this to roughly 2mm for faster response.
The chart above highlights why this effort is worth it. Reducing travel distance significantly improves reaction times in competitive shooters.
Required Tools Checklist
Using the wrong tools can strip screws or snap plastic tabs. Ensure you have the following items on your workbench before beginning.
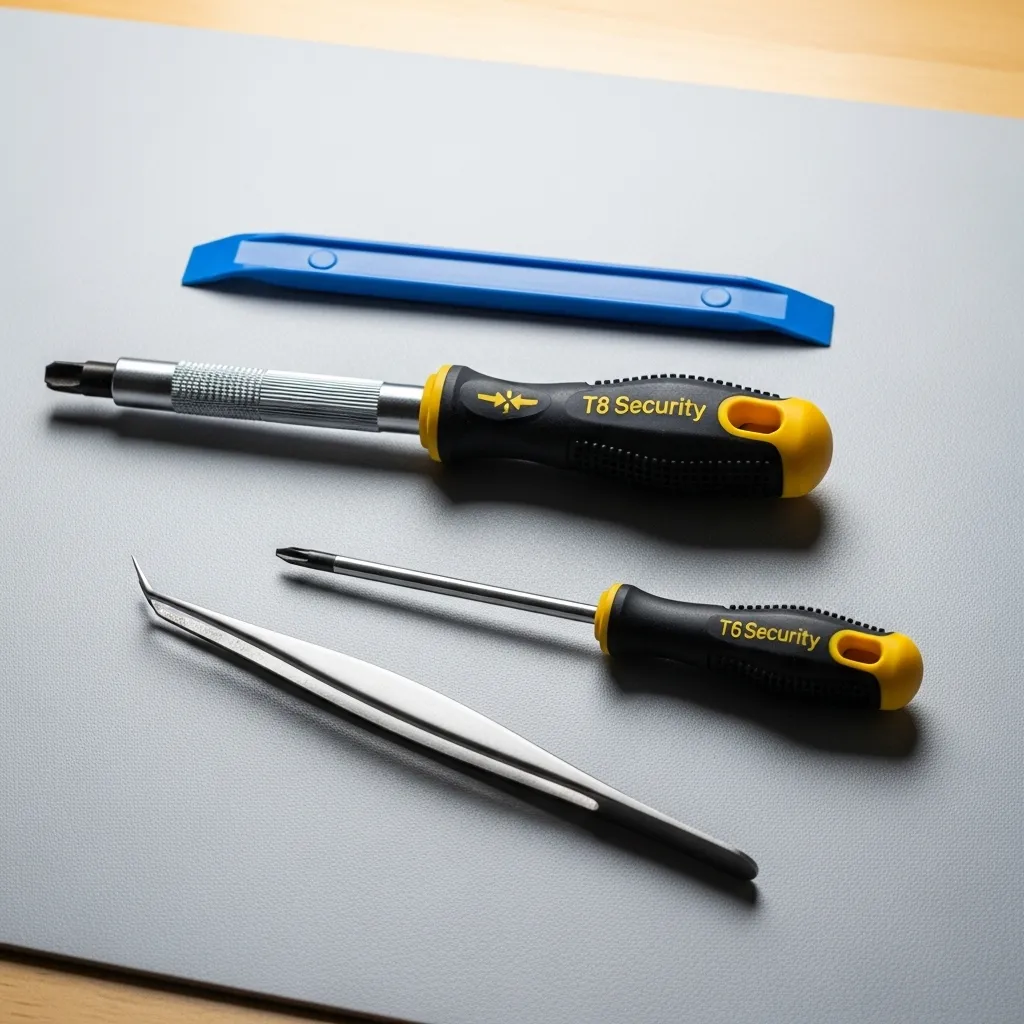
- Precision Screwdriver Set: For Xbox, you need T8 Security and T6 bits. For PlayStation, a PH00 Phillips is standard.
- Plastic Pry Tool: Essential for separating the shell halves without gouging the plastic seam.
- Tweezers: Angled precision tweezers help manipulate small springs and ribbon cables.
- Clean Workspace: A magnetic mat is ideal to keep screws from rolling away.
“The number one rule of repair is: if you force it, you break it. Plastic clips require finesse, not brute strength.”– Kyle Wiens, iFixit Manifesto
Protecting Your Hardware
While the controller is open, be extremely careful around the analog stick modules to avoid introducing debris that causes drift.
We recommend reading our article on Hall Effect vs Potentiometer Joysticks – Prevent Stick Drift to understand how sensitive these parts are.
Once you have your tools ready and a clean space prepared, we can move on to the actual installation steps.
Don’t forget to bookmark the Gamepad Trigger Pressure Test to compare your before-and-after analog values once the mod is complete.
Fast Facts
- Internal trigger stop installation is considered a moderate challenge that involves disassembling the controller but offers significant benefits by reducing trigger travel distance for faster response times.
- Essential tools are required to avoid damaging hardware, including precision screwdrivers (T8 Security/T6 for Xbox, PH00 for PlayStation), plastic pry tools, and tweezers.
- Careful handling is critical during the process, specifically regarding the finesse required for plastic clips and protecting analog stick modules from debris that could cause drift.
Disassembly and Prep: PS5 DualSense and Xbox Series X
Before cracking open your hardware, it is crucial to gather the right tools. Using the wrong screwdriver size can strip screw heads and ruin your day.
You generally need a plastic pry tool to safely remove faceplates without scratching the plastic. Metal tools can leave ugly gouges on the shell.
We also recommend testing your controller’s current performance. Use the Gamepad Trigger Pressure Test to verify baseline trigger values before you start.
Essential Tool Checklist
- Precision Screwdriver Set: You need high-quality bits to avoid stripping screws.
- Phillips #00 Bit: This is standard for the Sony DualSense controller internals.
- Torx T8 Security Bit: The Xbox Series X uses a security pin in the screw center.
- Spudger/Pry Tool: A flat plastic tool is best for popping off clips safely.
- Tweezers: These help with handling small ribbon cables and tiny screws.
Preparing the PS5 DualSense
The DualSense cleverly hides its screws. Start by lifting the black trim piece around the bottom of the controller with your pry tool.
You must also pop off the L1 and R1 buttons. Be gentle here, as the plastic clips can be fragile if you apply too much force at the wrong angle.
Once the screws are exposed, remove them and keep them organized. There are two screws under the L1/R1 buttons and two under the bottom black trim.
Carefully separate the front and back shells. Note that the battery is connected to the back shell, so do not pull them apart too fast.
“The wireless controller features familiar controls, and incorporates several new features such as haptic feedback and adaptive triggers.”– Sony Interactive Entertainment, DualSense Wireless Controller Features
Preparing the Xbox Series X Controller
The Xbox controller is easier to access but requires more force. You need to remove the two side grip panels to reveal the screws.
Pry firmly from the seam near the triggers. The clips here are strong, so you might hear a loud pop. This is usually normal for Xbox controllers.
Locate the five screws. Four are under the grips, and one is hidden behind the sticker in the battery compartment. You must puncture the sticker.
If you need a more visual walkthrough for this specific unit, refer to our DIY Custom Shell Swap Guide for Xbox Series X Controller.
| Feature | PS5 DualSense | Xbox Series X |
|---|---|---|
| Screw Type | Phillips #00 | Torx T8 Security |
| Hidden Screws | ❌ (Under trim/buttons) | ✅ (Behind battery sticker) |
| Soldering Needed | ❌ (Usually No) | ❌ (No) |
| Ribbon Cables | High Risk (Careful!) | Low Risk |
Keep your workspace clean and organized. We suggest using a magnetic mat to keep screws from rolling onto the floor and disappearing forever.
Once the back shell is off, disconnect the battery immediately. This prevents accidental shorts while you install your new trigger stops.
Critical Focus: Safe Handling of Delicate Ribbon Cables
When you open your gamepad to install trigger stops, you will immediately notice flat, flexible wires crisscrossing the interior.
These are ribbon cables, also known as flexible flat cables (FFC). They act as the nervous system of your controller, transmitting signals between the triggers, buttons, and the main motherboard.
Handling these cables requires extreme caution. They are significantly more fragile than standard round wires.
A single crease, tear, or punctured trace can permanently disable your controller features, such as the haptic feedback or the triggers you are trying to upgrade.
“The golden rule of electronics repair: if you have to force it, you’re likely breaking it. Connectors should release with minimal effort once unlocked.”– Kyle Wiens, The Atlantic Interview
Identifying Connector Types
Before you pull any cable, you must identify how it is secured.
Manufacturers like Sony and Microsoft use two main types of connectors for ribbon cables. Failing to recognize the difference is the most common cause of DIY damage.
- ZIF (Zero Insertion Force) Connectors: These have a locking flap (usually black or dark grey) on the back or front. You must flip this flap up with a fingernail or plastic tool to release the cable.
- Friction Connectors: These simply hold the cable tight. They have no moving latch. You pull the cable straight out using the reinforced stiffener tab.
If you mistakenly try to pull a cable out of a locked ZIF connector, you will rip the cable or tear the connector off the PCB. This damage is often irreversible without micro-soldering skills.
If you damage a specific module, you might need to consult our guide on how to fix a loose controller charging port, as these often share similar ribbon connections.
A bar chart comparing mating cycles: USB-C ports withstand 10,000 cycles, while delicate ribbon cable connectors are rated for only about 20 cycles.
Safe Removal Techniques
To safely remove these cables during your trigger stop installation, always use non-conductive tools. A plastic spudger or a pair of angled tweezers is essential.
Never pinch the white flexible part of the cable with metal tweezers, as you can crush the internal copper tracks.
Focus your grip on the “stiffener.” This is the rigid blue or white plastic tab at the very end of the cable.
It provides structural support for insertion and removal.
If you are modifying a DualSense, be aware that the adaptive trigger cables are short. Tension management is key here.
Once the cables are detached, keep them away from the edges of the shell.
When you reassemble the controller later, a pinched cable is a silent killer. It might work initially but fail after a few hours of gameplay.
While you have the controller open, it is also a perfect time to inspect other parts to prevent stick drift in the future.
Reconnection Checklist
When reassembling, follow this strict procedure to ensure a solid connection:
- Inspect the Pins: Ensure the gold contact pins on the ribbon cable are facing the correct direction (usually toward the pins in the socket).
- Open the Lock: For ZIF sockets, ensure the locking flap is fully raised before insertion.
- Align and Slide: Slide the cable in evenly. It should sit flush. If it goes in crooked, do not lock it; pull it out and realign.
- Engage the Lock: Push the flap down. It should click or snap softly. Give the cable a very gentle tug to confirm it is seated.
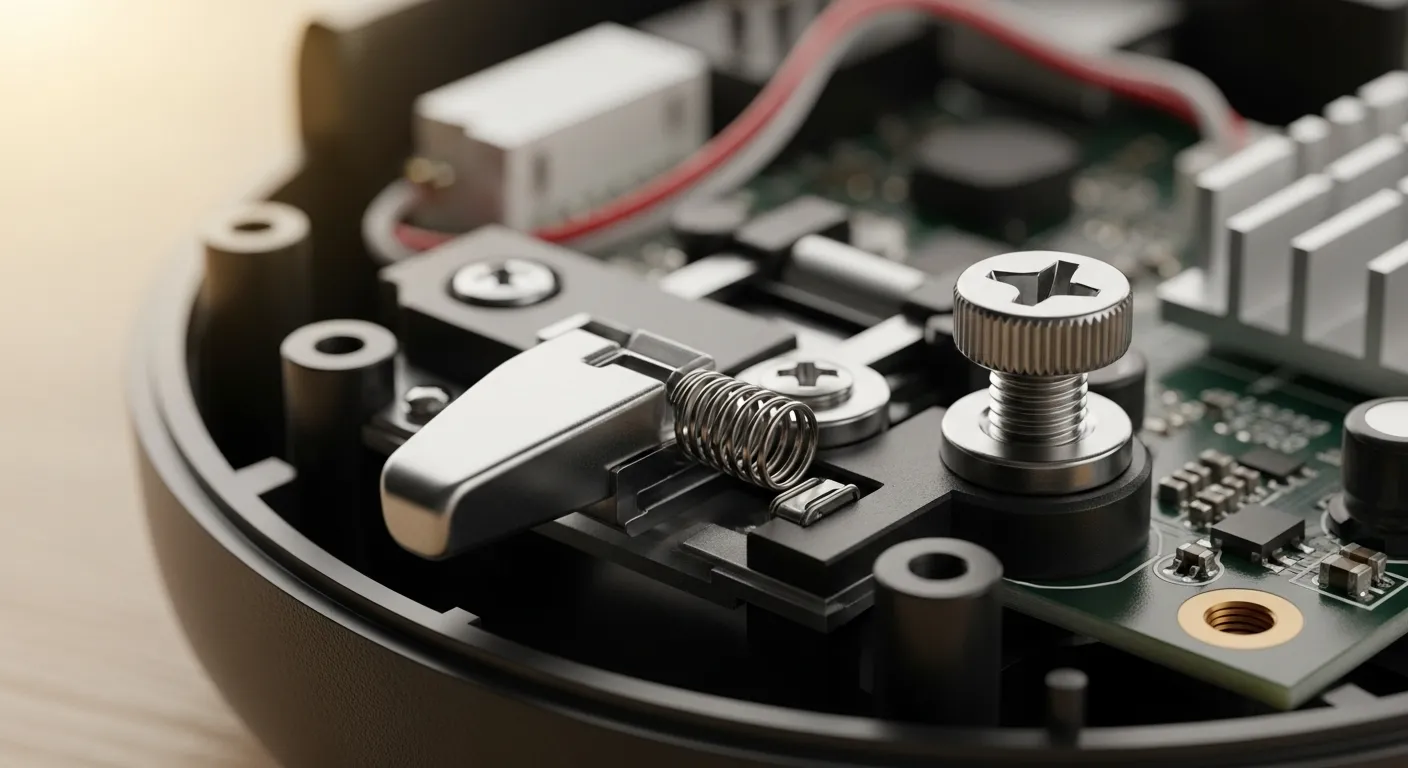
Placing the Trigger Stops and Adjusting Spring Tension
Now that your controller is open, we can move on to the most critical part of this mod. Installing trigger stops physically limits the range of motion.
This modification prevents the trigger from bottoming out unnecessarily. By shortening the travel distance, you can fire faster in competitive shooters.
Installing the Trigger Stop Mechanism
Most aftermarket kits, such as those for Xbox Series X or PS5 DualSense, use a simple screw or clip system. Follow these steps carefully.
- Locate the trigger housing: Identify the small plastic arm that moves when you press the trigger button down.
- Insert the stop screw: Thread the provided set screw into the designated pilot hole on the custom grip or housing.
- Adjust depth slowly: Tighten the screw until the trigger travel is reduced by about 50 percent. Test the feel constantly.
- Check clearance: Ensure the trigger still returns to its neutral position freely without getting stuck or rubbing.
“The Hair Trigger… allows you to tune the tension of the trigger… to reduce the latency of the trigger action.”– Scuf Gaming, SCUF Features Guide
Fine-Tuning Spring Tension
Reducing travel distance is only half the battle. You also need to manage the spring tension to ensure a snappy return to neutral.
If your triggers feel too loose after installing stops, the stock springs might be too weak for the shorter throw. Upgrading is often necessary.
Swap out the standard springs for the high-tension versions included in many advanced kits. These stiffer springs reset the trigger instantly.
A bar chart showing the reduction in travel distance from 7mm on a standard trigger to 2mm with trigger stops installed.
Verifying the Actuation Point
After mechanical installation, you must ensure the software still recognizes the input. If the stop is too tight, the command won’t register.
Use our Gamepad Trigger Pressure Test to visualize the input. The bar should hit 100% just before the physical stop hits the screw.
If the test shows only 80% or 90% input when fully pressed, you need to back the screw out slightly. The goal is a reliable 100% signal every time.
Proper calibration ensures you do not lose functionality in games that require full analog control, like racing simulators.
Fast Facts
- Successful disassembly requires specific tools for each controller, such as a Phillips #00 bit for the PS5 DualSense and a Torx T8 Security bit for the Xbox Series X, along with plastic pry tools to prevent damage.
- Accessing internal components differs by model, with the PS5 hiding screws under trim and buttons requiring gentle handling, while the Xbox Series X hides screws under side grips and a battery sticker.
- Critical safety precautions include disconnecting the battery immediately upon opening the shell and handling fragile ribbon cables with extreme care to avoid permanently disabling controller features.
Troubleshooting Stiff Triggers and Haptic Feedback Loss
Installation hiccups happen to the best of us. If your triggers feel like they are fighting back, or your rumble has vanished, do not panic.
Stiff triggers usually indicate simple mechanical friction. The new mechanism might be rubbing against the shell, or the spring could be misaligned.
Open the controller again and inspect the seating. If the spring is not perfectly vertical, it creates tension. Ensure the stop screw clears the housing.
Sometimes, debris or plastic shavings from the modding process can cause binding. A quick blast of compressed air often solves this friction issue.
For persistent sticking without reopening the shell, you might try external cleaning methods. These are detailed in our guide on how to fix sticky controller buttons without taking it apart.
Fast Facts
- Stiff triggers are usually caused by mechanical friction, such as a misaligned spring, the new mechanism rubbing against the shell, or debris.
- To resolve tension issues, reopen the controller to ensure the spring is seated vertically and the stop screw clears the housing, or use compressed air to clear plastic shavings.
Restoring Lost Haptic Feedback
Did the vibration disappear after you closed the case? The most common culprit is a pinched wire or a disconnected rumble motor plug.
Check the connection points on the motherboard. If you soldered wires for the stops, ensure you did not accidentally desolder the vibration motor leads.
Before worrying about hardware damage, run a diagnostic. Use our Gamepad Controller Vibration Test to confirm if the motors are receiving power.
A bar chart comparing trigger travel distance: Standard (100%), With Trigger Stop (40%), and Hair Trigger Mode (15%).
Fast Facts
- Inspect internal hardware for pinched wires, disconnected plugs, or accidentally desoldered leads on the motherboard, especially after reassembly.
- Run a software diagnostic test to confirm the motors are receiving power before assuming permanent hardware damage.
Calibrating for the New Stopping Point
A physical stop prevents the trigger from reaching the “100%” signal zone. In-game, this means your gun might not fire, or vehicles will not accelerate.
You must adjust the software deadzones. Set the “max” input threshold to match where the trigger physically stops to register a full press.
“You can also adjust the trigger dead zones, which is essential if you’re using the hair trigger locks.”– Mike Epstein, Xbox Wireless Controller Review
Troubleshooting Checklist
- Check Spring Alignment: Ensure the torsion spring sits perfectly in its groove to prevent grinding.
- Verify Wire Routing: Pinched wires can cause shorts, prevent the shell from closing, or cut power to haptics.
- Test Input Signal: Use the Gamepad Test tool to see if your trigger reaches the maximum value.
- Adjust Deadzones: Lower the max threshold in your software until the physical stop registers as 100%.
If the trigger feels mushy rather than stiff, the stop might be too short. You need a solid contact point for that satisfying click and rapid response.
Fast Facts
- You must adjust software deadzones to lower the max input threshold so the restricted physical trigger movement registers as a 100% signal.
- Proper hardware assembly requires checking spring alignment and wire routing to prevent grinding, shorts, or issues closing the shell.
- If the trigger feels mushy or fails to register full input, verify the stop length and signal strength using testing tools.
Ready to Lock and Load?
Installing trigger stops might look tough, but you have the skills now. Just take your time and use the right tools.
Once you are done, test those inputs. You will notice the speed difference immediately in your favorite FPS games.
This mod gives you a massive competitive edge. Say goodbye to slow inputs and hello to faster reaction times.
Good luck with the build! If you get stuck, check our other guides. Let’s get you back in the game.
Frequently Asked Questions
Will opening my controller void the warranty?
Yes, breaking the factory seal usually voids the warranty. If you are worried, stick to external clip-on trigger stops instead.
Are trigger stops good for racing games?
No, they are bad for racing. You need full trigger travel for gas and brakes. Only use stops for shooters where speed matters.
Can I undo the modification later?
Definitely. Just keep your original springs and screws in a safe place. You can swap the stock parts back in whenever you want.
Why does my trigger feel stiff after installing?
You may have tightened the screws too much. Loosen them slightly or check that the internal spring isn’t pinched.
Technical Glossary
- Trigger Stops
- Modifications, available as external clips or internal kits, that physically restrict the movement range of a controller’s trigger to enable faster response times.
- Travel Distance
- The measurement of how far a button moves when pressed, which is reduced from approximately 7mm to 2mm by trigger stops to improve competitive reaction speed.
- Ribbon Cables
- Delicate, flat cables used to connect internal electronic components within the controller that require steady hands and tweezers to manipulate without damaging.
- Stick Drift
- A hardware issue where the controller registers joystick movement without user input, often caused by debris entering the sensitive internal mechanisms.
- T8 Security
- A specific type of tamper-resistant screwdriver bit required to remove the screws securing the shell of an Xbox controller.


