Your controller is an extension of you, so why should it look generic?
This guide gives you the professional techniques to custom-paint your controller shell for a truly unique look.
We will cover everything from surface preparation to the final clear coat, ensuring a flawless, durable finish.
It is time to level up your controller’s style and make your gear truly one-of-a-kind.
Let’s get started!
TL;DR
- Proper surface preparation, including disassembly, cleaning, and sanding, is the most critical step for a durable paint job.
- Scuffing the shell with 400-600 grit sandpaper is essential for primer and paint adhesion, preventing future chipping.
- Advanced techniques like masking, stenciling, hydro dipping, and airbrushing allow for unique and professional-level custom designs.
- Avoiding common mistakes like poor preparation and rushing coats ensures a finish that looks and feels professional.
Preparing Your Controller Shell for Paint
The secret to a jaw-dropping custom paint job is not just the final spray. It is all in the prep work.
A clean, properly prepared surface is the foundation for a durable, professional finish that will not chip or peel.
Let’s get your shell ready!
Step 1: Complete Disassembly
First, you must completely disassemble your controller. You only want to paint the plastic shell pieces, not the delicate internal electronics.
Removing buttons, triggers, and circuit boards prevents accidental damage from paint or solvents.
The process varies for each controller model.
If you are new to this, following a guide can be a lifesaver. For example, our DIY custom shell swap guide for Xbox shows the general steps involved in taking a modern gamepad apart safely.
Step 2: Deep Cleaning and Sanding
Oils from your hands, dust, and manufacturing residues can ruin paint adhesion. Start by washing the shell pieces with warm, soapy water. After drying them completely, wipe every surface with isopropyl alcohol on a lint-free cloth.
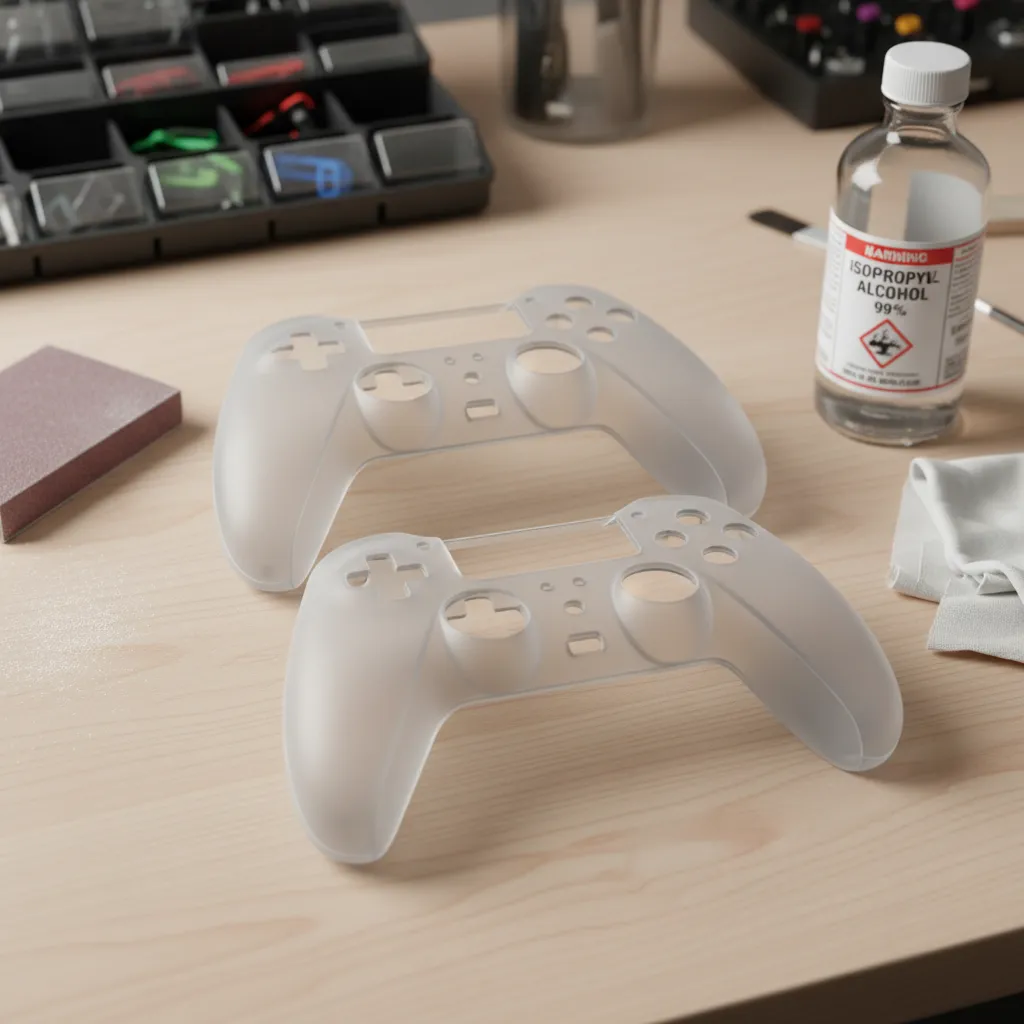
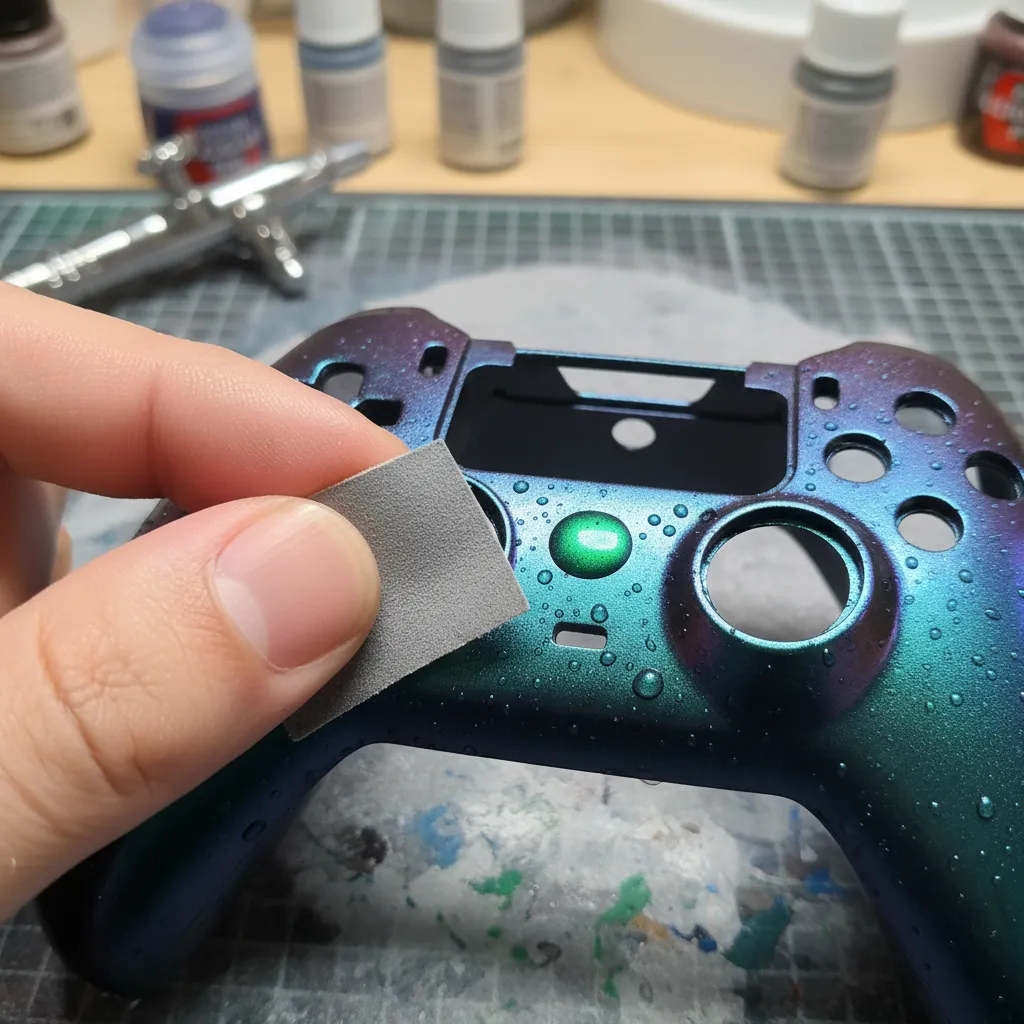
Next, it’s time to sand. This step, called “scuffing,” creates a microscopic texture for the primer to grip. Use a fine-grit sandpaper, around 400 to 600 grit, and lightly sand all surfaces you plan to paint. The goal is to dull the glossy finish, not to remove plastic.
“The simple fact is that for a coating to have good, long-term adhesion, the surface must be clean, and it must have the correct surface energy. If either of these is wrong, the coating will fail.”– Paul Uglum, Plastics Decorating Magazine
Your Pre-Painting Checklist
Once you’ve sanded, give the shell one final wipe-down with a tack cloth or a clean microfiber cloth to remove all dust. Follow these steps meticulously, and you’ll set yourself up for success.
- Carefully disassemble the controller, keeping all screws organized.
- Wash the plastic shell parts with warm, soapy water and let them dry thoroughly.
- Wipe all surfaces with isopropyl alcohol to remove any remaining oils.
- Lightly scuff the entire surface with 400-600 grit sandpaper.
- Remove all sanding dust with a tack cloth before moving to the priming stage.
A bar chart shows that poor surface preparation is the leading cause of DIY spray paint failure at 55%, followed by high humidity at 20%, rushing coats at 15%, and incorrect spray distance at 10%.
Fast Facts
- Thorough preparation, including complete disassembly and meticulous cleaning (washing with soap, then isopropyl alcohol), is foundational for a durable, professional paint finish on a controller shell.
- Scuffing the surface with fine-grit sandpaper (400-600 grit) is crucial to create a microscopic texture for primer adhesion, preventing chipping and peeling.
- Poor surface preparation, such as inadequate cleaning or sanding, is the leading cause of DIY spray paint failure, highlighting its critical importance.
Core Painting Techniques: Beyond a Single Color
Ready to level up your controller’s style?
A solid color is a great start, but true customization comes from patterns, fades, and unique designs.
Let’s explore advanced techniques to make your gamepad one-of-a-kind.
Stenciling and Masking for Sharp Designs
This is the best method for creating clean lines, geometric shapes, or logos.
Using low-tack painter’s tape and a craft knife, you can create crisp, professional-looking patterns.
It is all about precision and patience.
- Apply your base coat and let it fully cure.
- Carefully place your stencil or apply painter’s tape in the desired pattern.
- Press down all edges firmly to prevent paint from bleeding underneath.
- Apply a light second color over the masked area.
- Remove the tape or stencil slowly while the paint is still slightly wet for the cleanest edge.
Hydro Dipping for Complex Patterns
Hydro dipping, or water transfer printing, lets you apply intricate, pre-printed designs to your shell. This technique involves floating a special film on water and dipping the controller shell through it, wrapping the pattern seamlessly around every curve.
Airbrushing for Smooth Fades and Gradients
An airbrush offers incredible control for creating smooth transitions between colors. It is the go-to tool for gradients, fades, and subtle shading that you cannot achieve with a spray can.
Mastering an airbrush takes practice, but the results are stunning.
“For fine lines with an airbrush, use low pressure (around 18-20 psi) and get in close to your surface.”– Steve Driscoll, Iwata Airbrush
Weathering and Distressing Effects
Want a controller that looks like it has survived countless gaming battles?
Weathering techniques such as dry brushing with metallic paint for scuffs or applying a dark wash to settle into crevices for a grimy look add incredible character and realism.
Comparing Your Painting Options
Each technique offers a different look and requires a unique skill set. Choose the one that best matches your vision and comfort level.
If you are swapping shells for this project, check out a DIY custom shell swap guide for detailed steps.
| Technique | Difficulty | Typical Cost | Best For |
|---|---|---|---|
| Masking & Stenciling | Low | Low | ✅ Clean lines, logos, geometric patterns |
| Hydro Dipping | Medium | Medium | ✅ Complex, seamless patterns (camo, skulls) |
| Airbrushing | High | High | ✅ Smooth gradients, fine details, artistic effects |
| Weathering | Medium | Low | ✅ Battle-worn, aged, and realistic looks |
After your masterpiece is assembled, it is a good idea to test everything.
Use the Gamepad Controller Test to ensure all buttons, triggers, and analog sticks function perfectly post-customization.
Multi-Color, Stenciling, and Gradient Effects
Ready to level up from a single-color finish? Adding multiple colors, logos, or smooth gradients can transform your controller from a simple paint job into a true work of art.
These techniques require more patience but deliver incredible results.
Multi-Color Designs with Masking
Creating sharp, clean lines between different colors is all about proper masking.
Use high-quality painter’s tape or vinyl masking tape designed for models.
Apply your base coat and let it fully cure before you begin.
Carefully apply tape to cover the areas you want to protect.
Press the edges down firmly to prevent paint from bleeding underneath.
When painting, be mindful of small components; you do not want to affect the feel of a button or D-pad.
Flawless Stenciling for Custom Graphics
Stencils are perfect for adding logos, patterns, or intricate designs.
You can buy pre-cut vinyl stencils online or create your own using a craft cutting machine.
The key is ensuring the stencil is perfectly flat against the controller’s curved surface.
- Apply your base color and clear coat, then let it fully cure. Lightly sand the area with high-grit sandpaper to give the new paint something to grip.
- Carefully position your vinyl stencil on the shell. Use a squeegee or credit card to smooth it out, removing all air bubbles.
- Apply a very light “tack coat” of paint over the stencil. This helps seal the edges to prevent bleeding on subsequent coats.
- Build up the color with several more light coats of paint until you have full coverage.
- Gently peel the stencil off while the paint is still slightly tacky, not fully dry. Pulling it off when dry can cause the paint to chip at the edges.
Once your design is complete and cured, you can apply your final clear coats to protect the entire shell. This seals in your hard work and gives it a professional sheen.
“The golden rule of masking is to ensure that the tape is firmly pressed down, especially at the edges. This prevents paint from seeping underneath and creating a fuzzy line.”– Tamiya, Inc., Masking Techniques
Creating Smooth Gradient Effects
A gradient, or color fade, is an eye-catching effect achieved by blending two or more colors.
This technique works best with spray cans or an airbrush.
It is a great way to give your joypad a unique, dynamic look that stands out.
Start by painting the entire shell with the lightest color in your gradient.
Once it is dry, spray the next color from a distance, focusing on one area. Blend it by gradually moving the can away, allowing the spray to fade into the base color.
Fast Facts
- Advanced controller customization moves beyond single colors with techniques like stenciling and masking for sharp designs, hydro dipping for complex patterns, airbrushing for smooth fades, and weathering for aged looks.
- Each technique offers unique design capabilities, with varying levels of difficulty and cost, allowing users to choose the best method to match their specific vision for their gamepad.
- Precision and proper application, such as firmly pressing masking edges or using correct airbrush pressure, are critical for achieving professional and clean results with these advanced painting methods.
Troubleshooting Common Paint Imperfections
Even the most careful artist can face a few hiccups. Do not worry if your finish is not flawless on the first try!
Most common paint imperfections are fixable with a little patience.
Let’s get your custom shell looking pristine.
Paint Runs or Drips
This happens when too much paint is applied to an area, causing it to sag under its own weight. It is usually caused by holding the can too close or moving too slowly across the surface.
The key is to let the mistake dry completely.
To fix it, you will need to wet sand the drip.
Use a very fine-grit sandpaper (1500-2000 grit) with water to gently level the run until it is flush with the surrounding area. Then, reapply a light coat of paint to blend it in.
“The best way to fix a run is to let it dry completely. Then use some fine-grit sandpaper (1200 or 1500 grit) to carefully sand the run away.”– Eastwood Company, Common Spray Can Problems And How To Solve Them
Orange Peel Texture
Orange peel is a bumpy texture that resembles the skin of an orange. It often occurs if the paint dries too quickly, the temperature is too high, or you are spraying from too far away, causing the droplets to partially dry before hitting the surface.
This issue is typically fixed on the clear coat layer.
After the clear coat has fully cured, wet sand the entire surface with 2000-grit sandpaper until it is perfectly smooth and dull.
Then, use a polishing compound to restore the shine.
Dust and Debris
Tiny specks of dust or hair can ruin a smooth finish.
This is why a clean painting environment is so important!
If you spot a piece of debris in wet paint, you can try to carefully remove it with a pair of fine-tipped tweezers.
If the paint is already dry, you will have to sand the imperfection out.
Use a small piece of fine-grit sandpaper to focus just on the speck, then reapply your paint and clear coat as needed.
Be careful not to let paint build up around button openings, which can cause issues.
If you do, you may need a guide on how to fix sticky controller buttons.
Final Checks After Fixing
Once you have corrected any imperfections and fully reassembled your controller, it is crucial to test it. This ensures no dust from sanding or paint residue has affected the internal components.
Run a complete diagnostic with our Gamepad Controller Test to verify every button, trigger, and stick is responding perfectly.
Fast Facts
- Paint runs are fixed by letting them dry completely, then wet sanding with fine-grit sandpaper (1500-2000 grit) before reapplying a light paint coat.
- Orange peel texture, often caused by quick drying or spraying from too far, is corrected by wet sanding the fully cured clear coat with 2000-grit sandpaper and then polishing to restore shine.
- Dust and debris should be carefully removed with tweezers if wet, or by sanding dry specks with fine-grit sandpaper, followed by reapplication of paint and clear coat.
The Final Touch: Clear Coats for Durability
Your masterpiece is painted, but do not reassemble it just yet! The final clear coat is arguably the most crucial step.
It protects your hard work from sweat, oils, and the general wear and tear of intense gaming sessions. This is your shield.
Choose Your Sheen: Gloss, Satin, or Matte?
The clear coat also determines the final look and feel of your controller.
Your choice of finish, or sheen, will dramatically alter the appearance. Each has its own pros and cons for a custom gamepad.
- Gloss: This finish is highly reflective and shiny, making colors pop. It is smooth and easy to clean, but it can also highlight imperfections and show fingerprints easily.
- Satin (or Semi-Gloss): A perfect middle ground. Satin offers a slight sheen without the high reflectivity of gloss. It provides a premium look and is great at hiding minor surface flaws.
- Matte: A non-reflective, flat finish that provides a modern, stealthy look. It feels great in the hands and does not show fingerprints, but it can be more susceptible to showing scratches or scuffs over time.
How to Apply a Flawless Clear Coat
Applying the clear coat follows the same principles as painting. Patience and light, even coats are essential for a professional, durable result.
Take your time here to avoid drips or an uneven texture that could ruin your paint job.
- Shake the can vigorously for at least one full minute.
- Hold the can 10-12 inches away from the controller shell.
- Apply a very light mist coat first. This is your “tack coat” and helps the following layers adhere better. Let it dry for about 10 minutes.
- Apply 2-3 more light coats, waiting 15-20 minutes between each. Overlap your spray pattern by about 50% for even coverage.
- Ensure you do not apply the clear coat too heavily around button openings, as buildup can cause issues. A thick coat could lead to a situation that requires you to fix sticky controller buttons down the line.
“The final coat should be a full wet coat, but be careful to avoid runs. This will give you the highest gloss and best appearance.”– Dupli-Color, How-To Apply Clear Coat Guide
After your final coat, the most important part is waiting.
The shell might feel dry to the touch in an hour, but it needs to cure fully.
Let it sit in a dust-free area for at least 48-72 hours before you even think about reassembly.
Rushing this will lead to a soft finish that scratches easily.
Fast Facts
- The clear coat is a crucial final step for durability, protecting custom gamepads from wear and tear, and significantly impacts the controller’s final aesthetic (gloss, satin, or matte).
- Choosing the right sheen depends on the desired look and feel, with gloss being reflective, satin offering a balanced premium look, and matte providing a modern, non-reflective finish.
- Applying clear coat requires patience and light, even coats to prevent drips and ensure a professional, durable finish; a full cure of 48-72 hours is essential before reassembly.
Conclusion
You have learned the most critical step: proper preparation. From disassembly to sanding, you have the blueprint for a flawless custom paint job.
This is not just about changing a color; it is about making your gear truly yours. Do not be afraid to experiment with designs and techniques.
Now grab your tools and get creative. We cannot wait to see the masterpiece you create. Let’s get you back in the game, in style!
Frequently Asked Questions
What is the best type of paint to use on a controller?
Stick with spray paint made for plastics, like Krylon Fusion or Rust-Oleum 2X. Always start with a primer and finish with a durable clear coat!
How long should I wait between paint coats?
Patience is key! Wait about 15-30 minutes between color coats. For the final clear coat, check the can’s instructions for the full cure time.
Can I paint the controller’s buttons and thumbsticks?
It is best not to. Paint on high-contact parts wears away quickly and can make buttons feel sticky or even jam inside the shell.
What do I do if I mess up a layer of paint?
No worries, it happens! Let the paint dry completely. Then, lightly sand the mistake until it is smooth and repaint the area. Easy fix!
Technical Glossary
- Paint Adhesion
- The ability of a paint coating to stick or bond to a surface. The text emphasizes that proper cleaning and sanding are critical to achieve good adhesion and prevent the paint from chipping or peeling.
- Scuffing
- The technique of lightly sanding a surface to create a microscopic texture. This process is done to improve the grip of the primer and subsequent paint layers, leading to a more durable finish.
- Grit
- A measurement of the coarseness of sandpaper, based on the size of the abrasive particles. The text recommends a fine grit, between 400 and 600, to dull a glossy finish without removing excess material.
- Isopropyl Alcohol
- A solvent used in the cleaning process to wipe down the controller shell. Its purpose is to remove oils, grease, and other residues that soap and water might leave behind, ensuring a perfectly clean surface for painting.
- Tack Cloth
- A specialized sticky cloth used as the final step before priming to wipe away all fine dust particles created during the sanding process, ensuring a completely clean and dust-free surface.


