Ready to give your Xbox Series X controller a fresh new look? Swapping the shell is a fantastic way to personalize your gear.
This guide walks you through every step, from teardown to reassembly. Forget boring stock colors! We make it simple, so you can get that custom look you’ve been dreaming of.
Let’s level up your controller’s style and get you back in the game with a fresh new vibe!
TL;DR
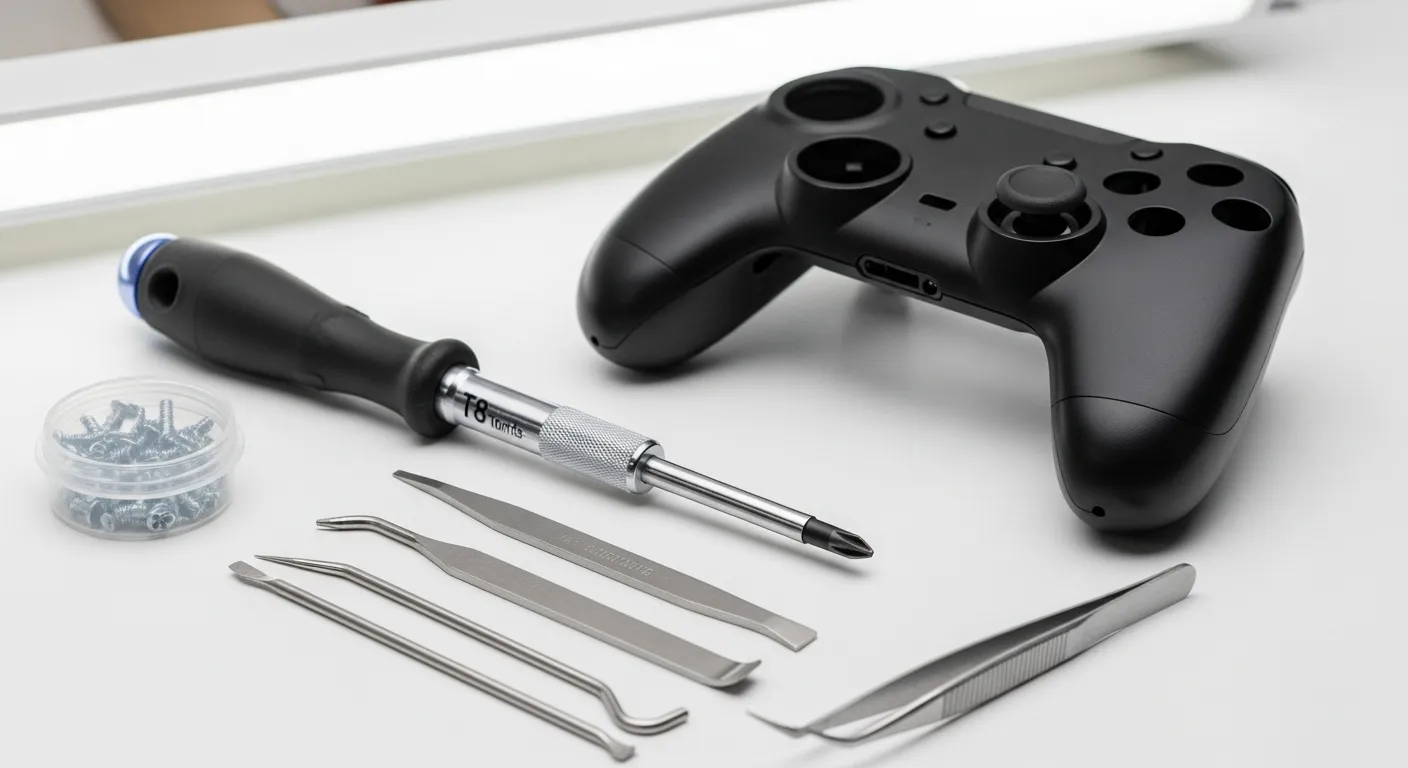
- Gather essential tools like a T8 Security Torx screwdriver and a plastic prying tool to prevent damage during disassembly.
- Choose a high-quality replacement shell for a better fit, feel, and durability compared to cheaper third-party options.
- Before starting, remove the batteries and perform a full diagnostic test on your controller to ensure it is fully functional.
Gearing Up: Tools, Quality Parts, and Initial Precautions
Before you dive in, let’s get your workstation ready. A successful shell swap is all about having the right gear and a bit of patience.
Gathering everything beforehand makes the process smoother and prevents any mid-project hiccups.
The Right Tools for the Job
You don’t need a professional workshop, but a few specific tools are non-negotiable.
Using the wrong tool can easily damage your controller’s plastic or strip a screw, turning a fun project into a frustrating one. Here is your essential toolkit:
- T8 Security Torx Screwdriver: This is the most crucial tool. The Xbox controller uses special screws, and a standard screwdriver won’t work.
- Plastic Prying Tool (Spudger): Essential for safely separating the shell halves without scratching or cracking the plastic.
- Tweezers: Helpful for handling small ribbon cables and components.
- Small Phillips Screwdriver: You may need this for a few internal screws, depending on the controller model.
- A Clean, Well-Lit Workspace: A magnetic mat or a few small bowls will keep your screws organized and prevent them from rolling away.
Choosing Your New Shell: Quality Matters
The market for custom shells is vast, ranging from official limited editions to countless third-party options.
The quality can vary significantly, so it’s important to choose wisely. A poor-quality shell might not fit correctly or feel cheap in your hands.
| Feature | OEM / High-Quality Shells | Cheap Third-Party Shells |
|---|---|---|
| Fit and Finish | ✅ Precise fit, no gaps | ❌ May require trimming or sanding |
| Material Feel | ✅ Durable, premium texture | ❌ Often thin, brittle, or slippery |
| Color & Design | ✅ Consistent and durable | ❌ Paint may chip or wear easily |
| Price | ❌ Higher cost | ✅ Very affordable |
Initial Precautions and Testing
Before you remove a single screw, take a moment for some final checks. First, remove the batteries to prevent any accidental short circuits.
This is a simple but critical step for protecting the internal electronics of your joypad.
Next, connect your controller to a PC and run a full diagnostic with our Gamepad Controller Test. Verify that every button, trigger, and analog stick is working perfectly.
This ensures you’re not blaming the shell swap for a pre-existing issue.
“Using the right screwdriver bit is the most important step of any repair.”– Kyle Wiens, iFixit
You’re not alone in wanting to personalize your gear. In fact, a YouGov survey found that 20% of console gamers in the US have customized their hardware, showing just how popular these DIY projects are.
A bar chart showing that 25% of PC gamers and 20% of console gamers in the US have customized their hardware.
With your tools gathered, your new shell inspected, and your controller tested, you are officially ready to begin the disassembly. Let’s get started!
Fast Facts
- Gather the right tools, especially a T8 Security Torx Screwdriver and plastic prying tools, to avoid damaging your controller.
- Choose high-quality replacement shells for a proper fit and durable feel, as cheap alternatives can lead to poor fit and material quality.
- Before starting, remove batteries and test your controller thoroughly with a diagnostic tool to ensure it’s functioning correctly and to prevent blaming new parts for existing issues.
The Custom Shell Swap Process
Ready to give your controller a fresh look? This process requires patience and a steady hand, but the result is a truly personalized gamepad. Let’s dive in and get this mod done right.
Step-by-Step Shell Replacement
Follow these instructions carefully to ensure a smooth and successful shell swap. Organize your screws and components as you go to make reassembly much easier.
- Disassemble Your Controller: Start by removing the battery cover and batteries. Next, carefully pry off the two side grips. This will expose five T8 security screws. Remove these screws to separate the backplate from the faceplate.
- Remove the Faceplate: With the screws out, gently separate the two halves of the shell. Be mindful of the plastic clips holding them together. Lift the front faceplate away from the controller’s internal assembly.
- Transfer Components: Now, you’ll move the buttons, D-pad, and other components from the original faceplate to your new custom shell. Pay close attention to the small rubber membranes under the buttons, as they must be placed correctly.
- Reassemble with the New Shell: Place the new faceplate onto the controller assembly, ensuring all buttons are seated properly. Reattach the backplate, making sure it clicks into place. Finally, screw everything back together, but avoid over-tightening.
“The number one tip I would give somebody is to take your time… Rushing is what breaks things. Especially when you’re taking things apart, pay attention to how they came apart so you can put them back together.”– Ben Heckendorn, The Engadget Interview
Post-Swap Testing
Once your controller is reassembled, it’s crucial to test every function. You don’t want to discover a mushy button or a non-responsive stick in the middle of a game!
Connect your newly customized controller to your PC and run a complete diagnostic. Use our Gamepad Controller Test to check every button, trigger, and analog stick axis.
Since you handled the rumble motors, also run the Gamepad Controller Vibration Test to ensure they work correctly.
Disassembly: Careful Internal Component Removal
With the shell open, you’re looking at the heart of your controller. It’s time to carefully remove the internal components.
Organization is key here, so keep your magnetic tray handy for every screw and small part.
Step-by-Step Component Removal
Patience is your best tool. Work slowly and deliberately to avoid damaging any delicate parts. Let’s get these components out safely so they can be placed into your awesome new shell.
- Disconnect Rumble Motors: You’ll see two vibration motors, one in each grip. Their wires connect to the main circuit board. Gently unplug them. If they are soldered, you’ll need a soldering iron to desolder the two points for each motor.
- Unscrew the Main Circuit Board: The main board, or PCB, is held in place by several screws. Carefully remove them all. Before lifting the board, double-check for any hidden clips or remaining connections.
“A single spark from your finger can be the end for a delicate chip. To be extra safe, you can use an anti-static wrist strap, which will safely ground you and prevent any accidental ESD.”– iFixit, The Definitive Guide to ESD Safety
- Lift the Board and Thumbsticks: Gently lift the PCB out. The thumbstick modules are attached to it. Be careful not to bend any pins or snag any ribbon cables that might be connected underneath.
- Remove Triggers and Bumpers: The triggers and bumper buttons can now be lifted out. They often have small springs or clips, so note their orientation for easy reassembly. These pieces can be delicate, so handle with care.
- Extract D-Pad and Buttons: The D-pad and ABXY buttons will now lift out easily, along with their underlying silicone membranes. This is a good time to inspect the D-pad for any wear that might be causing issues.
Once everything is out, lay all the internal components on your anti-static mat. You’ve successfully disassembled your controller and are ready for the fun part: moving everything to its new custom home!
Reassembly: Integrating Your New Custom Shell
You’re on the home stretch! With the old shell removed, it’s time to give your controller its new look.
Reassembly is straightforward, but precision is key to ensuring everything works perfectly. Let’s get it put back together.
Step-by-Step Reassembly
Follow these steps carefully, working in the reverse order of disassembly. Take your time to ensure every component sits correctly in the new shell.
- Position the Motherboard: Gently place the main circuit board into the new bottom shell. Align it with the screw posts and ensure the ports, like the USB-C and headphone jack, fit perfectly into their cutouts.
- Reconnect Components: Re-seat the rumble motors in their designated slots. If you disconnected their wires, carefully plug them back into the motherboard. Make sure no wires are pinched or stretched.
- Align the Top Shell: Place the new top shell over the motherboard. Wiggle the analog sticks and press the buttons to confirm they move freely and aren’t catching on anything. Once aligned, gently press the shells together until they click into place.
- Secure with Screws: Re-insert the T8 security screws into their holes. Do not tighten them fully yet. Getting the screws right is one of the most critical parts of any electronic repair.
“The number one most important thing…is screw organization. Almost all of the fatal errors that beginners make are from putting a long screw in a short screw hole.”– Jessa Jones, Forbes
- Final Tightening: Tighten the screws in a cross pattern, similar to changing a tire. This applies even pressure across the shell. Tighten until you feel resistance, then stop. Overtightening can crack the new plastic shell.
- Attach Side Grips: Snap your new side grips onto the controller. They should fit securely with no gaps or movement.
- Power Up: Finally, insert your batteries and put the battery cover on. Your custom Xbox controller is now complete!
Post-Swap Testing
Before you celebrate, it’s essential to test all functions. Power on the controller and connect it to your PC or console. A full diagnostic ensures your hard work paid off and everything is game-ready.
Confirm that every button clicks, the triggers have full range, and the analog sticks respond correctly.
A great final check is to test the motors you reconnected. Use our Gamepad Controller Vibration Test to make sure the haptics are buzzing as they should. Now, you’re ready to play in style!
Fast Facts
- Patience and carefulness are crucial for a successful shell swap, especially when disassembling and handling delicate internal components like rumble motors, circuit boards, and small buttons, to avoid damage.
- Organization is key throughout the process; keeping screws and components sorted will greatly simplify reassembly and ensure all parts are correctly placed.
- After reassembly, conduct thorough post-swap testing of all controller functions, including buttons, triggers, analog sticks, and rumble motors, to confirm everything works correctly.
Post-Swap Troubleshooting & Comprehensive Checklist
Congratulations, your controller has a fresh new look! But before you jump back into your favorite game, it’s crucial to run a full diagnostic.
Let’s make sure every button, stick, and trigger is working perfectly after the swap.
The first step is a comprehensive systems check. This ensures all internal components were reconnected correctly and are seated properly in the new shell.
A methodical test now saves you from frustrating mid-game failures later. Let’s get it done!
The Ultimate Post-Swap Checklist
Work through this list to confirm your controller is 100% mission-ready. Connect your controller to a PC and use our tools for the most accurate results.
- Power & Connectivity: Does the controller power on instantly? Does it pair and maintain a stable connection via USB and wirelessly?
- Face Buttons: Press A, B, X, and Y. Do they feel responsive and not sticky? Check that each input registers correctly.
- Analog Sticks: Rotate both sticks in full circles. Do they move smoothly without grinding? Test for any unwanted movement with our Gamepad Drift Test. Press them in (L3/R3) to check the click function.
- D-Pad: Press up, down, left, and right, as well as the diagonals. Each press should feel distinct and register accurately.
- Bumpers & Triggers: Test the LB and RB bumpers for a solid click. For the triggers, use the Gamepad Trigger Pressure Test to ensure they register the full range of motion from a light tap to a full press.
- Menu & Special Buttons: Don’t forget to check the View, Menu, and Share buttons.
- Vibration Motors: Fire up a game that uses rumble or use a dedicated test application. Confirm that both the large and small rumble motors are working.

Common Problems and How to Fix Them
Hit a snag? Don’t worry. Most post-swap issues are easy to fix with minor adjustments. Here are the most common problems you might encounter.
Mushy or Unresponsive Buttons
If your face buttons or D-pad feel soft, stiff, or don’t register every press, the culprit is likely the silicone membrane underneath.
The membrane may have shifted during reassembly. Open the controller and ensure it’s perfectly aligned with the pegs on the circuit board.
“Take your time, don’t force anything, and double-check every connection. The most common mistake is a simple one: something isn’t plugged in all the way.”– Brad Chacos, PCWorld
Analog Stick Drift or Sticking
Unwanted stick movement, or drift, can happen if a wire is being pinched by the analog stick module. It can also occur if debris fell into the mechanism during the swap.
Carefully reopen the shell and check the wire routing around both sticks. Ensure they move freely without catching on anything.
Triggers Aren’t Working Correctly
If a trigger feels loose or isn’t registering properly, the small magnetic sensor may be misaligned or the spring unseated.
Check that the trigger assembly, including the spring and magnet, is correctly placed. A misaligned magnet is a common cause of input failure.
Controller Won’t Power On or Connect
This is often caused by a loose connection. The first thing to check is the battery connector; make sure it’s fully plugged into the motherboard.
Also, inspect the ribbon cables and other connectors to ensure none were dislodged or damaged during reassembly.
Fast Facts
- Perform a comprehensive systems check after a controller shell swap to ensure all components are reconnected and functioning correctly.
- Utilize a detailed checklist to test every button, stick, trigger, and vibration motor, connecting to a PC for accurate diagnostics.
- Troubleshoot common issues like unresponsive buttons, stick drift, trigger malfunctions, and power problems by checking component alignment, wire routing, and connector seating.
Mission Complete: Your Custom Controller Awaits!
Congratulations, you did it! You’ve successfully personalized your Xbox controller. It’s a fantastic way to make your gaming setup truly your own.
Remember the skills you learned here. With the right tools and a little patience, you can tackle any hardware mod. Now, let’s get you back in the game!
Frequently Asked Questions
What if a button feels sticky after reassembly?
This usually means a rubber membrane is misaligned. Open the controller again and ensure all silicone pads are seated correctly. A small adjustment fixes it!
Can I paint the original shell instead of buying a new one?
You can, but it requires proper sanding, priming, and sealing. For most gamers, a pre-made custom shell offers a more durable and professional finish.
Will swapping the shell void my Xbox controller’s warranty?
Yes, opening your controller will almost certainly void the manufacturer’s warranty. Only proceed if your controller is out of its warranty period.
How long does a typical shell swap take for a beginner?
Set aside about 45 to 60 minutes for your first time. Take your time, stay organized, and don’t rush the process. It gets faster with practice!
Technical Glossary
- T8 Security Torx Screwdriver
- A specialized screwdriver designed to fit the star-shaped security screws used in Xbox controllers, which cannot be removed with standard screwdrivers.
- Spudger
- A plastic prying tool used to safely separate the plastic halves of a controller’s shell without causing scratches, cracks, or other damage.
- OEM
- An acronym for Original Equipment Manufacturer. It refers to parts made by the same company that produced the original device, ensuring a precise fit and high-quality materials.
- Short Circuit
- An unintended, low-resistance connection in an electrical circuit that can cause damage to electronic components. Removing the controller’s batteries is a key precaution to prevent this.
- Ribbon Cable
- A wide, flat cable used for connecting internal components within an electronic device like a controller. They are often delicate and require careful handling with tools like tweezers.


