Is that rattling from your controller’s rumble motor driving you crazy? Don’t worry, it’s a common issue with an easy fix!
This guide will show you how to silence that annoying buzz yourself. No need to buy a new controller.
Let’s pop open that shell, tighten things up, and get you back in the game with smooth, quiet rumbles. Level up your DIY skills and fix your gear like a pro!
TL;DR
- Diagnose the rattle by sound: a plastic clatter usually means loose debris, while a metallic buzz points to a misaligned motor.
- Confirm the source by shaking the controller while it’s off for physical rattles or using a vibration test for motor-specific noise.
- Disassembly requires specific tools for each console, such as a TR8 Torx for Xbox or a Phillips #00 for PS5 and Switch Pro.
Diagnosing the Rattle: Metallic Buzz vs. Plastic Clatter
Before grabbing your screwdriver, take a moment to really listen to your controller. The pitch and rhythm of the noise usually reveal the root cause.
Identifying the specific type of sound can save you from unnecessary repairs. A rattle implies loose debris, while a buzz suggests mechanical interference.
A plastic clatter sounds like a small Lego brick tumbling inside a dryer. This usually indicates a broken plastic clip or a loose screw post.
You can verify this by gently shaking the gamepad while it is turned off. If you hear the noise without any power, it is physical debris trapped inside.
Conversely, a metallic buzz or high-pitched grinding sound is strictly mechanical. This happens when the spinning counterweight hits an internal wall.
This noise only occurs when the rumble features are active. To confirm this, you should run a specific diagnostic tool to isolate the motors.
We recommend using the Gamepad Controller Vibration Test to trigger the left and right motors independently. This helps locate the fault.
| Diagnostic Sign | Plastic Clatter | Metallic Buzz |
|---|---|---|
| Sound Profile | Hollow, tumbling sound | Sharp, rapid grinding |
| Trigger | Movement or shaking | Active vibration/rumble |
| Likely Cause | Broken clip or loose screw | Motor weight alignment |
| Fix Difficulty | ✅ Easy (Remove debris) | ❌ Moderate (Reseat motor) |
Sometimes the buzzing is actually caused by the controller casing vibrating against loose buttons. This creates a “sympathetic vibration” that mimics motor failure.
If you suspect the intensity is simply too high for your aging hardware, you can check our guide on how to customize Xbox Series X|S controller vibration on PC to reduce the stress.
A bar chart showing controller failure rates: Stick Drift (63%), Button Sticking (21%), Rumble/Haptics (11%), and Trigger Springs (5%).
If the sound is a high-frequency whine, the motor itself may be failing. This indicates the internal bearings are dry or worn out from excessive use.
“If a vibration motor is making excessive noise but still functions, check for displacement. The counterweight often shifts on its shaft and grazes the controller housing.”– Repair Wiki Contributors, Xbox One Wireless Controller Vibration Motor Replacement
Once you have identified the sound profile, you can decide whether you need to simply shake out a loose piece of plastic or perform a motor repair.
Fast Facts
- Distinguish the noise source by its sound profile: a hollow ‘plastic clatter’ usually indicates loose physical debris, while a sharp ‘metallic buzz’ points to mechanical interference with the rumble motors.
- Verify the cause using specific triggers; debris rattles when shaking the controller even without power, whereas mechanical buzzing only occurs when vibration features are active.
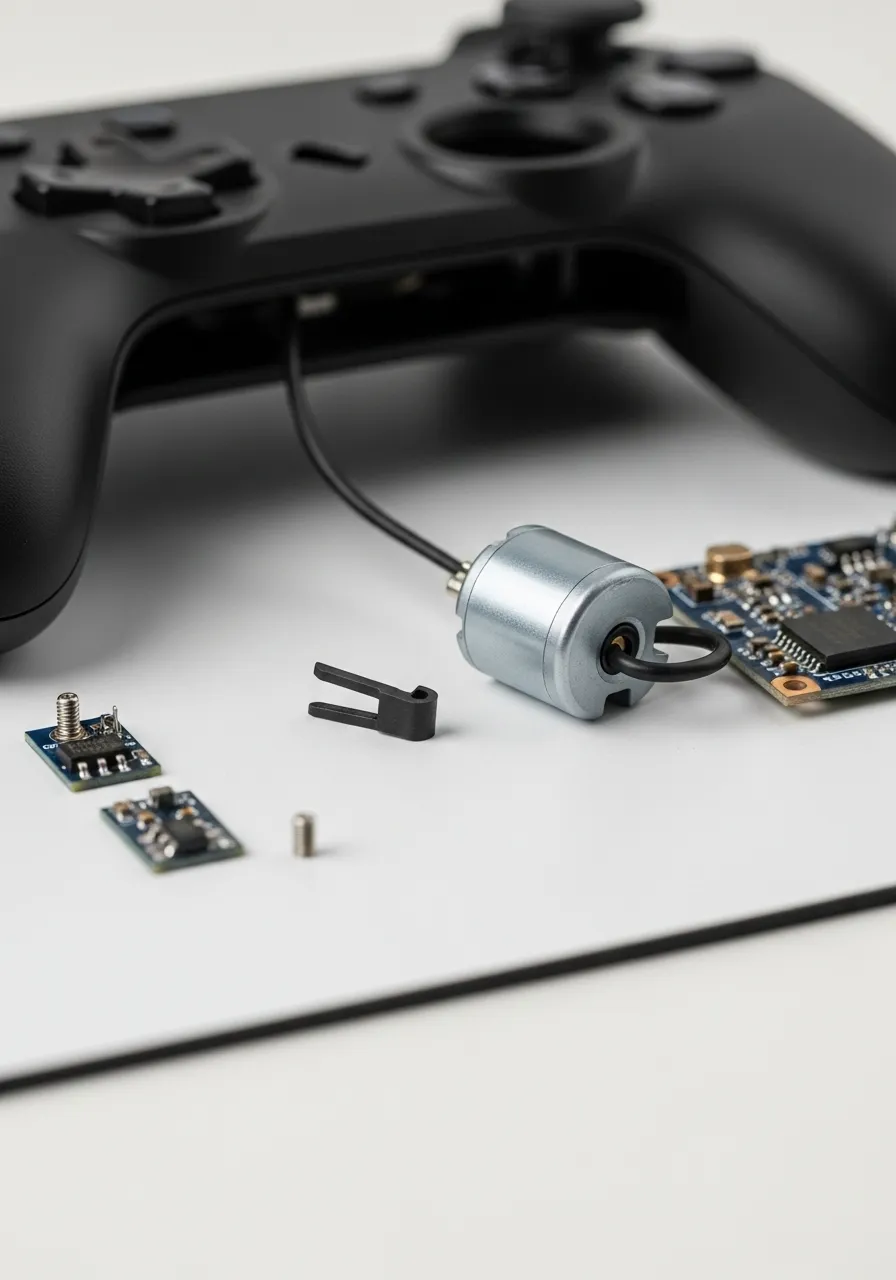
Accessing the Motors: Disassembly for Xbox, PS5, and Switch Pro
Before you crack open your controller, ensure you have the right tools. You will need a plastic pry tool and specific screwdrivers for the job.
For Xbox, a TR8 Torx Security bit is essential. For PS5 and Switch Pro, a Phillips #00 usually does the job. Always work on a clean surface.
“The DualSense is significantly more complex than the DualShock 4, but it is still accessible for repair with patience.”– Sam Goldheart, iFixit DualSense Teardown
Xbox Series X|S Disassembly
Start by removing the plastic covers on the rear grips. Use your pry tool to pop them off gently to avoid snapping the clips.
You will see five screws. Four are in the handle areas, and one is hidden behind the sticker in the battery compartment.
Once unscrewed, the faceplate lifts off. You can now inspect the large rumble motors in the grips. While inside, you can also check for other issues like those described in our Xbox Series X|S D-Pad clicking repair guide.
PS5 DualSense Disassembly
Pry off the black decorative trim around the bottom of the controller. It snaps off, revealing two screws near the bottom handles.
Next, gently pop off the L1 and R1 buttons. There are hidden screws underneath them that secure the top of the casing.
Separate the two halves carefully. Be extremely gentle, as fragile ribbon cables connect the triggers and battery to the mainboard.
This is a great time to clean around the components. If you notice other hardware faults, check our fixes for DualSense adaptive triggers not working.
Nintendo Switch Pro Controller Disassembly
Remove the single screw at the bottom of each handle grip. Slide the grips off to reveal the main backplate screws.
Unscrew the backplate to expose the battery. Remove the battery to access the final screws holding the inner frame together.
The HD Rumble motors are rectangular units attached to the frame. They differ significantly from the rotating weights in other pads.
A bar chart comparing repair difficulty: Switch Pro (8/10), Xbox Series X (7/10), and PS5 DualSense (6/10).
Once open, look for loose debris or wires hitting the spinning weights. This physical contact is the most common cause of rattling.
Use our Controller Vibration Test to spin the motors while the case is open. This helps identify the exact noise source safely.
Fast Facts
- Disassembly requires specific tools, including a plastic pry tool, a TR8 Torx Security bit for Xbox, and a Phillips #00 screwdriver for the PS5 and Switch Pro.
- Accessing the internal motors involves removing hidden screws located under components like the Xbox battery sticker, PS5 L1/R1 buttons, or Switch Pro grips.
- Rattling issues are often caused by debris or wires hitting the spinning weights, which can be identified by running a vibration test while the controller casing is open.
Repairing the Rumble: Stabilization and Debris Removal
If your gamepad sounds like a maraca every time it vibrates, simple troubleshooting might not be enough. A physical rattle usually indicates an internal issue.
The noise is often caused by a loose piece of plastic debris bouncing around inside the shell. It could also be the rumble motor itself vibrating against the casing.
To solve this, we need to perform some minor surgery. Don’t worry, as this process is straightforward for most modern controllers.
Fast Facts
- A rattling sound in a vibrating gamepad typically indicates internal physical issues, such as loose debris or a motor striking the casing.
- Fixing the noise usually requires disassembling the controller to remove the loose object or stabilize the motor.
Opening the Controller Housing
Before you begin, ensure your controller is completely disconnected from any power source. If it has a removable battery pack, take it out immediately.
You will need a small screwdriver set and a plastic pry tool. Remove the screws securing the backplate. Keep them in a magnetic tray to avoid losing them.
Gently separate the front and back shells using your pry tool. Be careful not to snap the plastic retention clips, as these can become new debris.
Fast Facts
- Ensure the controller is disconnected from power and batteries are removed for safety.
- Use a small screwdriver set and a plastic pry tool, keeping screws organized in a magnetic tray.
- Gently separate the front and back shells with the pry tool to avoid breaking plastic retention clips.
Locating and Removing Debris
Once the controller is open, look for any loose objects. Often, a small piece of plastic from a trigger stop or screw post has broken off.
Turn the shell upside down and give it a gentle shake. If the debris falls out, you have likely solved the rattling issue.
Use a can of compressed air to blow out any dust or smaller particles hiding in the crevices. This is also a great time to clean the board contacts.
“Use a soft cloth dampened with a 70% or less isopropyl alcohol (IPA) solution. Do not use disinfectant wipes.”– Microsoft Support, Clean and care for your Xbox console and accessories
Fast Facts
- Inspect the open controller for loose objects like broken plastic pieces.
- Gently shake the controller shell upside down to dislodge any hidden debris.
- Use compressed air to clean out dust and small particles, and clean board contacts with a soft cloth dampened with 70% or less isopropyl alcohol.
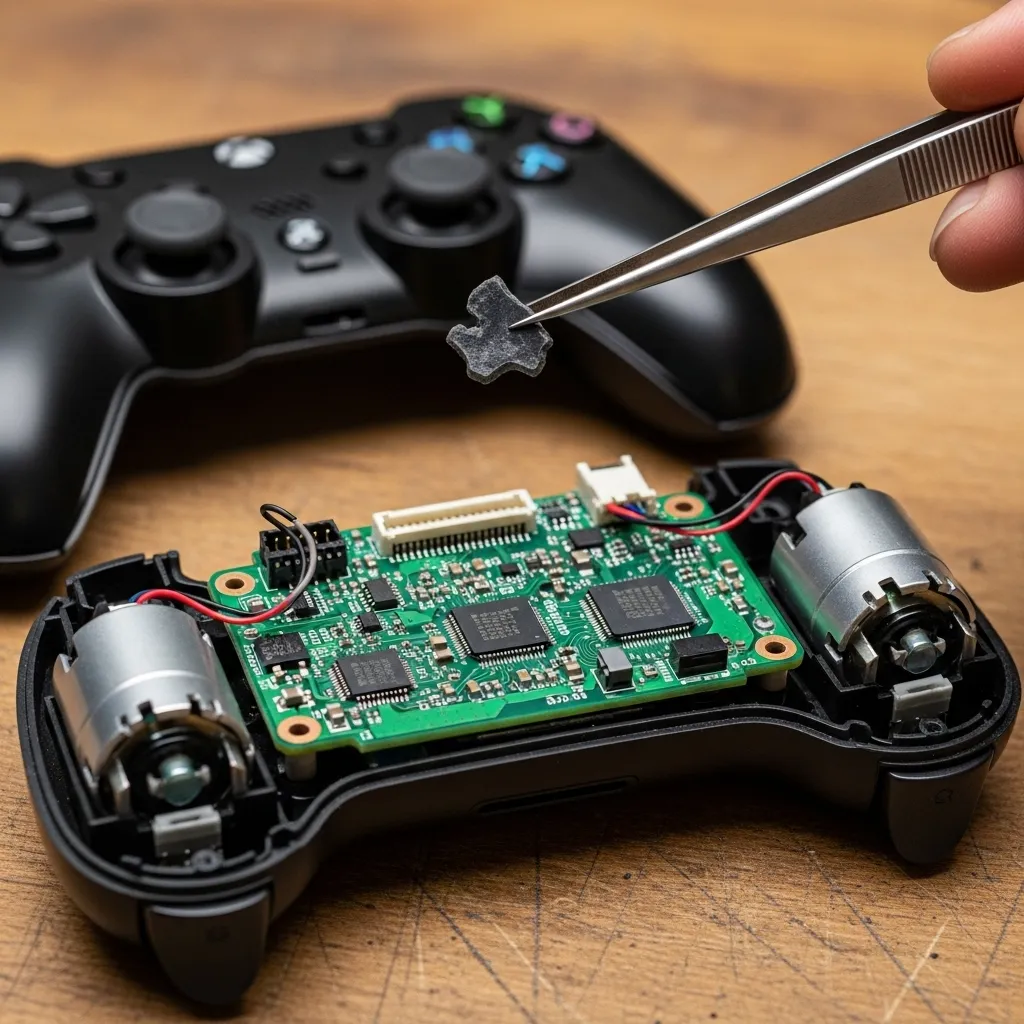
Stabilizing the Rumble Motor
If there is no loose debris, check the motors. These heavy weights spin at high speeds and can loosen their mountings over time.
Gently wiggle each motor. If it moves significantly within its housing, it needs to be secured. A loose motor creates a loud buzzing sound during gameplay.
Cut a small strip of double-sided foam tape. Lift the motor slightly and place the tape underneath it to act as a shock absorber.
This foam acts as a cushion. It prevents the hard metal of the motor from vibrating directly against the hard plastic of the controller shell.
Alternatively, a very small dab of silicone adhesive can hold the motor in place. Allow it to cure fully before reassembling the device.
Fast Facts
- Loose rumble motors cause loud buzzing and require stabilization.
- Check for significant movement of the motor within its housing to diagnose the issue.
- Stabilize the motor by placing double-sided foam tape underneath it or using a small dab of silicone adhesive.
Why Vibration Maintenance Matters
Maintaining your haptics is crucial for immersion. A rattling motor breaks the illusion of the game and can actually lower your reaction time.
Most gamers agree that accurate feedback is essential. Ensuring your motors are tight and debris-free restores the premium feel of the hardware.
A bar chart showing that 78% of gamers feel haptic feedback increases immersion, while only 7% find it distracting.
Fast Facts
- Proper vibration maintenance is crucial for maintaining gaming immersion and preventing negative impacts on player reaction time.
- Accurate and well-maintained haptic feedback is highly valued by gamers, contributing to a premium hardware experience.
- A large majority of gamers (78%) find haptic feedback enhances immersion, with very few finding it distracting.
Reassembly and Testing
Carefully align the shells and snap them back together. Reinsert the screws, but do not overtighten them, as this can crack the plastic posts.
Once reassembled, it is time to verify the fix. You need to run a controlled test to ensure the rattle is gone and the motors spin freely.
Head over to our Gamepad Controller Haptic Actuators Test. This tool lets you spin the motors at various intensities to check for noise.
If the rattle persists, you may need to reopen the device and check for hidden cracks in the chassis. However, most users find the silence restored.
While you are in a maintenance mood, you might also want to ensure your inputs are crisp. If your buttons feel gummy, check our guide on how to fix sticky controller buttons without taking it apart for simpler cleaning tips.
Securing Loose Counterweights and Motor Housings
If your gamepad sounds like a maraca during intense gaming moments, the internal counterweights are likely the culprit. These components spin to create rumble.
Over time, the plastic clips holding these motors can snap or loosen. This causes the metal casing to vibrate against the controller shell directly.
Before you start, grab the correct screwdriver for your model and a plastic pry tool. You need to open the controller to access the rumble motor housings.
“Mounting of the actuator is critical. A loose actuator will result in audible buzzing and poor haptic response rather than clear vibration.”– Texas Instruments, Haptic Feedback Implementation Guide
Diagnosing the Source of the Rattle
Once the controller is open, locate the two heavy motors in the grips. Gently wiggle them to see if they move within their plastic brackets.
If the motor shifts easily, it is not secure. Even a millimeter of movement can create a loud rattling noise when the weight spins at high speeds.
Sometimes, the issue is not the motor itself but a stray wire. Ensure no internal cables are touching the spinning weight, which creates a ticking sound.
Step-by-Step Fix for Loose Motors
Securing the motors is a straightforward process. Follow these steps to dampen the noise and restore a premium feel to your controller.
- Apply Electrical Tape: Wrap one layer of electrical tape around the metal body of the motor to thicken it. Press it back into the slot for a snug fit.
- Use Double-Sided Foam: If the bracket is broken, place a small square of double-sided foam tape under the motor to hold it firmly in place.
- Hot Glue Method: For a permanent fix, apply a tiny drop of hot glue to the edge of the motor housing. Be careful not to glue the spinning weight itself.
- Check Wire Routing: Use a spudger to tuck loose wires away from the spinning zone. Tape them down if necessary to prevent future contact.
After securing the hardware, it is smart to test the results. You want to ensure the motors still spin freely without hitting the casing.
If you prefer a software solution before opening your device, you can customize your controller vibration settings to reduce the intensity.
A pie chart showing that ERM motors (65%) are still the most common in controllers, followed by LRA (25%) and others.
The chart above highlights why rattling is so common. Most controllers still use ERM tech, which relies on heavy spinning weights that require rigid mounting.
Once you have reassembled your controller, run a diagnostic to verify the fix. You can use the Gamepad Controller Haptic Actuators Test to cycle through vibration levels.
Listen closely as the motors spin up. You should hear a smooth hum rather than a harsh rattle. If silence returns, you are ready to get back in the game.
Removing Broken Plastic Clips and Foreign Debris
If your gamepad sounds like a maraca when you shake it, you likely have loose components inside the shell. This is often distinct from motor failure.
A rattling noise usually indicates that a small piece of plastic has snapped off. This frequently happens after a drop or rage-quit moment.
Before you blame the haptic actuators, perform a simple “shake test.” Hold the controller triggers down to prevent them from moving and shake the unit.
If you hear a loose object tumbling around, it is physical debris. This could be a broken retention clip, a loose screw, or even food crumbs.
Sometimes, external gunk gets inside and hardens. If your inputs feel gummy alongside the noise, learn how to fix sticky controller buttons without taking it apart first.
Opening the Controller Safely
To remove the debris, you must open the device. You will typically need a TR8 or TR6 security screwdriver and a plastic pry tool.
Avoid using metal knives or screwdrivers to pry open the shell. Metal tools will gouge the soft plastic of the controller housing permanently.
“Insert a spudger into the seam… and pry the side panel away from the controller body.”– iFixit, Xbox One Wireless Controller Teardown
Locating the Source of the Rattle
Once the shell is open, visually inspect the interior. Turn the bottom shell upside down and gently tap it to dislodge any loose fragments.
Look for small black or white plastic tabs. These are often the internal clips that hold the two halves of the shell together during assembly.
If the plastic clips are broken, you can safely discard them. The screws alone are usually sufficient to hold the controller together tightly.
Check the vibration motors specifically. A loose counterweight on the motor shaft can hit the plastic casing, creating a loud mechanical rattle.
If the noise comes from a specific button area rather than a loose weight, you might need our Xbox Series X|S D-Pad clicking repair guide for deeper mechanical fixes.
Common Debris Types and Solutions
Identifying what fell out helps you prevent future damage. Here is a breakdown of what you might find rattling inside your gamepad.
| Debris Type | Likely Cause | Action Required |
|---|---|---|
| Plastic Tabs | Drops or forceful opening | Remove and discard immediately. |
| Loose Screw | Factory defect or vibration | Locate the empty hole and retighten. |
| Solder Ball | Manufacturing excess | Remove carefully to avoid shorts. |
| Motor Weight | Glue failure on axis | Re-glue weight or replace motor. |
Use compressed air to blow out any dust or crumbs found near the analog stick modules. This prevents future drift issues.
Once the foreign object is removed, reassemble the controller. Ensure no cables are pinched between the plastic shells before tightening screws.
Test the vibration intensity immediately after reassembly. Run a test on the Gamepad Test site to ensure the motors spin freely without hitting the case.
Fast Facts
- Proper reassembly and post-fix testing are crucial; ensure screws are not overtightened and use a haptic actuator test tool to verify the rattle is gone.
- Rattling in gamepads often stems from loose motor counterweights or broken internal plastic clips; these can be secured using methods like electrical tape, double-sided foam, or hot glue.
- The prevalence of ERM motors, which use heavy spinning weights, means rigid mounting is essential, and any looseness can easily lead to audible buzzing and poor haptic response.
Game On: Silence the Rattle for Good
Identifying the sound is half the battle. Knowing if it is plastic or metal guides your repair path.
Don’t let a small rattle turn into a big problem. Loose debris can jam buttons if left unchecked.
Whether reseating a motor or shaking out a clip, fixing it now saves your hardware later.
Grab your tools and silence the noise. Level up your controller maintenance and get back to gaming!
Frequently Asked Questions
Why is my controller making a buzzing noise?
This is often a motor counterweight hitting the internal plastic shell. It usually happens after a drop or hard impact.
Can I fix a rattle without taking the controller apart?
If it is just loose plastic debris, shaking the controller upside down might dislodge it. Give it a try!
Does a rattling motor affect gameplay?
Yes, it ruins immersion. Plus, the physical friction can eventually damage the motor or nearby wiring.
How do I test specific rumble motors?
Use a tool like Gamepad Tester. It lets you trigger the left and right heavy or light motors independently.
Technical Glossary
- Plastic Clatter
- A hollow, tumbling sound that suggests loose physical debris, such as a broken plastic clip or screw post, is trapped inside the controller casing. This noise can typically be reproduced by shaking the device while it is powered off.
- Metallic Buzz
- A sharp, high-pitched grinding sound that is strictly mechanical and only occurs when the controller’s vibration or rumble features are active. It is often caused by a spinning motor counterweight hitting an internal wall.
- Counterweight
- An eccentric, spinning weight attached to a motor inside a game controller. Its rotation creates the vibration effect for rumble and haptic feedback. If it shifts on its shaft, it can graze the housing and cause noise.
- Rumble Features
- The system in a game controller responsible for creating tactile vibration feedback, often using motors with counterweights. A metallic buzz noise is a diagnostic sign that this system has a mechanical fault.
- Sympathetic Vibration
- A secondary vibration that occurs when the frequency from a primary source, like a rumble motor, causes other loose parts, such as buttons, to vibrate in response. This can create a buzzing sound that mimics direct motor failure.


