Dusting off that legendary Xbox 360 controller for some PC gaming? Excellent choice!
If Windows 11 isn’t recognizing your wireless receiver, don’t panic.
It is a classic driver hiccup, but we have the fix.
In this guide, I will walk you through the manual driver installation step-by-step to get that green light steady.
Let’s cut through the tech frustration and get you back in the game!
TL;DR
- Identify ‘Unknown Device’ errors in Device Manager caused by missing Xbox 360 receiver drivers.
- Verify Hardware IDs (VID/PID) to distinguish between official Microsoft receivers and generic clones.
- Manually force the ‘Xbox 360 Wireless Receiver for Windows’ driver installation to fix connection issues.
Identifying the Unknown Device Error in Windows 11
Connect your wireless receiver to a USB 2.0 port on your PC. On modern operating systems like Windows 11, the familiar plug-and-play sound might not play.
Instead, you might notice that the light on the receiver does not turn on. We need to dig into the system settings to see how Windows classifies it.
Open the Device Manager. You can do this quickly by right-clicking the Start button and selecting it from the menu list that appears.
Look for a section labeled “Other devices”. Inside, you will likely see an entry named “Unknown device” marked with a small yellow triangle icon.
This icon indicates that Windows detects the hardware’s presence but lacks the specific instructions, or drivers, to communicate with it effectively.
For those using third-party dongles, the process mirrors setting up other wireless inputs.
You can learn more in our guide on how to use a 2.4G wireless controller gamepad.
Fast Facts
- If a connected wireless receiver fails to light up or play a plug-and-play sound, use the Device Manager to investigate the issue.
- The presence of an ‘Unknown device’ with a yellow triangle under ‘Other devices’ indicates that Windows detects the hardware but is missing the specific drivers needed to operate it.
Verifying Hardware IDs
To confirm this “Unknown device” is indeed your Xbox 360 receiver, we must check its Hardware ID. Right-click the device and select Properties.
Navigate to the Details tab in the window that pops up.
In the “Property” dropdown menu, select Hardware Ids to reveal a string of text.
Compare the alphanumeric values you see with the table below. This helps identify if you have an official Microsoft receiver or a generic clone.
| Receiver Type | Vendor ID (VID) | Product ID (PID) | Status |
|---|---|---|---|
| Official Microsoft | 045E | 0719 | ✅ Supported |
| Generic / Clone | 045E | 0291 | ⚠️ Common |
| Generic / Clone | 045E | 02A9 | ⚠️ Common |
Knowing your specific ID is crucial. It ensures you select the correct driver version in the next steps, which prevents potential system instability.
“The most common cause of ‘Unknown Device’ errors in Device Manager is a missing device driver… or the device uses a driver that is not compatible with your version of Windows.”– Tim Fisher, Lifewire
Why is this hassle necessary? Xbox controllers remain the dominant input device for PC gaming, but legacy driver support is fading in newer Windows builds.
A pie chart showing controller usage on Steam: Xbox Controllers (59%), PlayStation Controllers (26%), Steam Deck (10%), and Other (5%).
With Xbox devices accounting for 59% of sessions, maintaining compatibility is vital. Even if the OS forgets the device, the hardware is likely fine.
Once you have confirmed the Hardware ID matches a known Xbox 360 receiver profile, you are ready to manually force the driver update.
If you suspect connection quality issues after the fix, run a Gamepad Latency Test to ensure your wireless signal is stable and responsive.
Now that we have positively identified the unrecognized hardware, we can proceed to the manual driver installation to clear that yellow error flag.
Fast Facts
- Verify whether the receiver is an official Microsoft unit or a generic clone by checking the Hardware Ids in the Device Manager’s Details tab.
- Matching the specific Vendor ID (VID) and Product ID (PID) is crucial for selecting the correct driver to prevent system instability.
- Confirming the Hardware ID is a necessary prerequisite for manually forcing a driver update to resolve ‘Unknown Device’ errors.
Executing the Manual Driver Update Process
Getting your receiver recognized involves a manual push. Windows 11 often labels it as an “Unknown Device” because it lacks the automatic identifier.
We need to tell the operating system exactly what this hardware is. This forces the correct driver to load and bypasses the automatic search process.
- Open Device Manager: Right-click the Start button and select Device Manager from the menu list to access your hardware settings.
- Locate the device: Look under the “Other devices” section for an “Unknown device” that usually displays a yellow warning icon.
- Initiate update: Right-click the unknown device and select “Update driver” to begin the manual installation wizard.
- Choose manual browse: Select the option labeled “Browse my computer for drivers” rather than the automatic search option.
- Select from list: Click on “Let me pick from a list of available drivers on my computer” to access the built-in Windows legacy drivers.
- Find the category: Scroll down the list of hardware types and select “Xbox 360 Peripherals,” then click Next.
- Select the driver: Choose “Xbox 360 Wireless Receiver for Windows.” If multiple versions appear, pick the latest one available.
- Confirm installation: A warning prompt regarding device compatibility will appear. Click “Yes” to finalize the driver update.
“Device Manager provides a central and organized view of all the Microsoft Windows recognized hardware installed on a computer.”– Computer Hope, Device Manager Definition
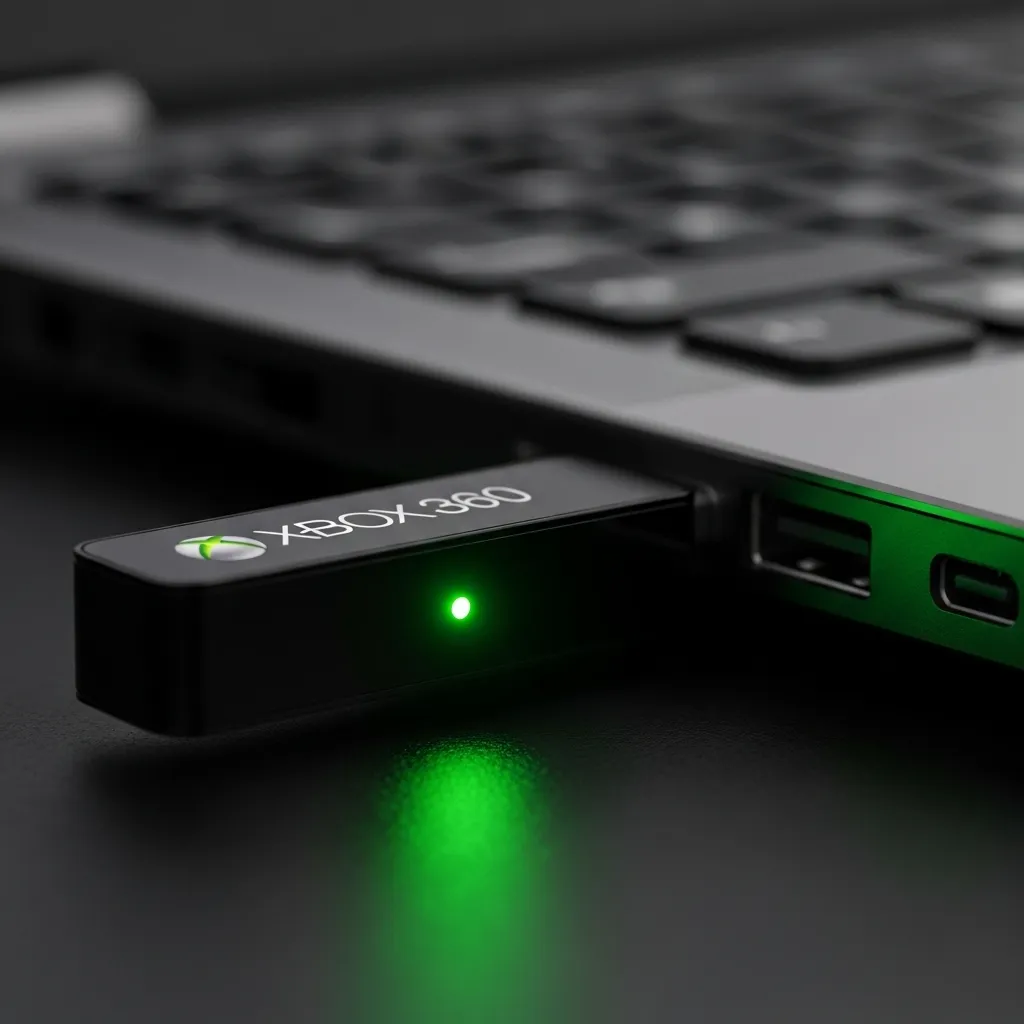
Once the driver installs successfully, the light on your receiver should turn solid green. This indicates the unit is powered and ready to pair.
If you are curious about the underlying technology, check our guide on how to use a 2.4G wireless controller gamepad for more technical details.
Now that the receiver is active, sync your controller. Press the connection button on the receiver, then the sync button on your gamepad to link them.
After pairing, verify that every button and stick registers correctly using the Gamepad Test. This ensures zero latency during gameplay.
Navigating to Xbox 360 Peripherals via ‘Let Me Pick’
You have successfully opened the update window. Windows 11 will offer to search automatically for you. Do not choose that option; it rarely works here.
Click on “Browse my computer for drivers”. This manual method is the only way to force the system to recognize your wireless receiver correctly.
On the next screen, you will see a text box to search for a location. Ignore that box completely. We need to access the built-in driver list.
Click the option at the bottom that says “Let me pick from a list of available drivers on my computer”. This unlocks the hidden Windows database.
“If Windows doesn’t find a new driver, you can look for one on the device manufacturer’s website and follow their installation instructions.”– Microsoft Support, Update drivers manually in Windows
Now you will see a list of device types. This list is very long and sorted alphabetically. Scroll down slowly until you find “Xbox 360 Peripherals”.
It is crucial that you select the correct category. You might see similar names like “Xbox Peripherals,” but those will not work for this specific hardware.
Selecting the Correct Device Type
Precision is key here. Selecting the wrong category will prevent the specific receiver driver from appearing in the next step of the process.
- Scroll Down: Move past the common devices like “Keyboards” or “Mice”.
- Locate: Look strictly for Xbox 360 Peripherals.
- Select: Click on it to highlight it, then click the “Next” button.
Once you click Next, you will finally see the specific model drivers we need. This is where the magic happens for your retro gaming setup.
If you are setting this up for older games, you are on the right track. The 360 pad is still one of the best controllers for emulation on PC.
Getting this driver right ensures your input lag is low. You can verify this later using the tools on the Gamepad Controller Test page.
Forcing Driver Version 2.1.0.1349 for Clone Support
Many inexpensive wireless receivers are essentially “clones” of the official hardware. They function identically but often lack the official security ID.
Because of this, Windows 11 treats them as an “Unknown Device.” The system does not automatically associate the hardware with the built-in drivers.
To fix this, you must force the installation of a specific driver. Version 2.1.0.1349 is widely regarded as the most stable for these clone units.
“A hardware ID is a vendor-defined identification string that Windows uses to match a device to an INF file.”– Microsoft Learn, Hardware IDs
This manual process overrides the system’s hesitation. It tells Windows to ignore the ID mismatch and communicate with the receiver anyway.
Follow these steps to manually assign the driver:
- Right-click the Start button and open Device Manager. Find the Unknown Device under “Other devices.”
- Right-click the device and choose Update driver. Select Browse my computer for drivers.
- Click Let me pick from a list of available drivers on my computer. This bypasses the automatic search.
- Scroll down and select Xbox 360 Peripherals. If you do not see this, look for “Xbox 360 Wireless Receiver for Windows.”
- Select the driver version 2.1.0.1349 (Suitable Release Date). Click Next.
- A scary warning will pop up claiming incompatibility. Ignore it and click Yes to force the update.
Once the window closes, the “Unknown Device” should vanish. It will be replaced by the correct receiver entry in your list.
This manual method is a handy skill for gamers. It is similar to the steps used to update firmware on generic Bluetooth gamepads.
With the driver active, press the sync button on both the receiver and your controller. They should connect immediately.
You should now test the stability of this connection. Use our Gamepad Latency Test to ensure there is no input lag.
Fast Facts
- To fix the ‘Unknown Device’ issue in Windows 11, users must manually update the driver via Device Manager by choosing to browse the computer for drivers and selecting ‘Let me pick from a list of available drivers’.
- The process requires specifically locating the ‘Xbox 360 Peripherals’ category in the hardware list and selecting the ‘Xbox 360 Wireless Receiver for Windows’ driver to force the OS to recognize the hardware.
- After confirming the installation despite compatibility warnings, the receiver is successfully updated when its light turns solid green, indicating it is ready to pair with a controller.
Verifying Successful Hardware Installation
Once you have manually updated the drivers, the most critical step is ensuring Windows 11 recognizes the hardware correctly.
You need to confirm the “Unknown Device” label has disappeared.
Open the Device Manager again.
Expand the section labeled “Xbox 360 Peripherals” at the bottom of the list. You should see “Xbox 360 Wireless Receiver for Windows” listed clearly.
If you still see a yellow warning triangle, the driver signature enforcement might be blocking the installation.
However, if the icon is clean, your receiver is ready for pairing.
“If you see a yellow warning icon next to a device, it means Windows has identified a problem. Right-click the device and select Properties to view the error code.”– Microsoft Support, Check if your device is working properly
Fast Facts
- Confirm successful installation by opening Device Manager and ensuring the “Unknown Device” label is replaced by “Xbox 360 Wireless Receiver for Windows” under the “Xbox 360 Peripherals” section.
- Ensure there are no yellow warning triangles next to the device listing, as a clean icon indicates the receiver is ready for pairing, while a warning suggests potential driver signature or hardware issues.
Syncing Your Controller
With the receiver active, you must bridge the connection to your gamepad. The green light on the receiver indicates it is receiving power from the USB port.
Follow these steps to establish a secure 2.4GHz link between your hardware components:
- Activate the Receiver: Press the small button on the receiver. The light will begin flashing, searching for a device.
- Power the Controller: Hold the Guide button (Xbox logo) on your controller until it turns on.
- Initiate Sync: Press the small sync button located on the top edge of the controller, near the charging port.
- Wait for Lock: The lights on both devices will spin and then lock onto a specific quadrant (usually Player 1).
Fast Facts
- Initiate the syncing process by pressing the button on the USB receiver until the light begins flashing.
- Power on the controller and press the sync button located on the top edge to pair the devices.
- Confirm the connection is established when the lights on both the receiver and controller stop spinning and lock onto a quadrant.
Testing Inputs and Diagnostics
Visual confirmation is good, but functional testing is better. You need to ensure every axis and button registers without delay or ghost inputs.
Head over to the Gamepad Drift Test to visualize your analog stick performance. Ideally, the sticks should center perfectly when you let go.
If the cursor on the screen moves on its own, your hardware might be aging, or the deadzone settings need adjustment. This is common with older Xbox 360 units.
A bar chart showing that Driver Issues (45%) and Battery/Power (25%) are the leading causes of connection failure.
Don’t forget to test the vibration motors. If the rumble feels weak or makes a strange sound, it might not be a driver issue.
You can check our guide on how to fix controller rumble motor rattling noise for hardware solutions.
Finally, verify your triggers.
The Z-axis triggers on Xbox 360 controllers are pressure-sensitive. Ensure they register from 0% to 100% smoothly during your test.
Fast Facts
- Perform comprehensive functional testing on all inputs, ensuring buttons, pressure-sensitive triggers, and axes register smoothly without delay or ghosting.
- Utilize diagnostic tools to check analog sticks for drift and centering issues, adjusting deadzone settings if specific hardware movement is detected.
- Verify the condition of vibration motors for hardware faults and investigate drivers or battery power as primary causes for connection failures.
Mission Complete: Get Back in the Game
Installing the Xbox 360 receiver on Windows 11 is easy once you identify the correct Hardware ID using the steps above.
By manually updating the driver in Device Manager, you can bypass that annoying “Unknown Device” error efficiently.
Now that your receiver light is solid green, grab your controller and jump back into the action. Level up your setup!
Frequently Asked Questions
Why does Windows 11 not detect my receiver automatically?
Windows 11 dropped native support for older hardware. It sees the receiver but needs you to manually point it to the legacy driver.
Which driver version should I select from the list?
Choose “Xbox 360 Peripherals” and then “Xbox 360 Wireless Receiver for Windows.” This usually fixes generic clones too.
Will this receiver work with my Xbox One controller?
No. This receiver is only for Xbox 360 gamepads. Xbox One and Series X controllers use Bluetooth or the newer Xbox Wireless Adapter.
The driver is installed, but the light is still blinking. Why?
A blinking light means the driver is working, but the controller isn’t paired. Press the sync button on both devices to connect.
Technical Glossary
- Device Manager
- A Windows system utility that allows users to view and control the hardware attached to the computer, used in the text to locate the ‘Unknown device’.
- Driver
- Software containing specific instructions that allow the operating system to communicate effectively with hardware components; a missing driver is often the cause of device errors.
- Hardware ID
- An alphanumeric string found in the device properties that uniquely identifies the specific hardware model to ensure the correct driver version is selected.
- Plug-and-play
- A feature that allows an operating system to automatically detect and configure hardware devices when they are connected, often indicated by a sound.
- Vendor ID (VID)
- A specific segment of the Hardware ID (e.g., 045E) that identifies the manufacturer of the device, helping distinguish between official hardware and generic clones.


