Worn-out thumbstick grips ruining your game? Don’t toss that controller!
This DIY guide shows you how to easily replace those slick, worn grips for a fresh, grippy feel.
It’s a quick, cheap fix that makes a huge difference in control and comfort.
Let’s get your controller feeling brand new and get you back in the game with pinpoint accuracy.
Level up your hardware skills and save your favorite gamepad!
TL;DR
- Replacing worn thumbstick grips is a fast, affordable DIY fix that extends your controller’s life.
- There are two main methods: simple, tool-free grip covers for a quick fix, and full thumbstick cap replacement for a permanent solution.
- Before starting, it’s crucial to test for underlying mechanical issues like stick drift using a gamepad tester.
- Basic tools like a plastic pry tool and replacement grips are often all you need for the job.
DIY Controller Thumbstick Grip Replacement: Your Universal Hub
Worn-out thumbstick grips can ruin your gaming experience. That loss of traction affects your aim, control, and overall comfort.
But you don’t need to buy a new controller. A DIY grip replacement is a fast, easy, and affordable way to get back in the game.
This guide is your central hub for replacing thumbstick grips on any controller. We’ll cover the tools, the universal steps, and what you need to know before you begin.
Restoring that fresh-out-of-the-box feel is easier than you think and is a great first step in controller maintenance.
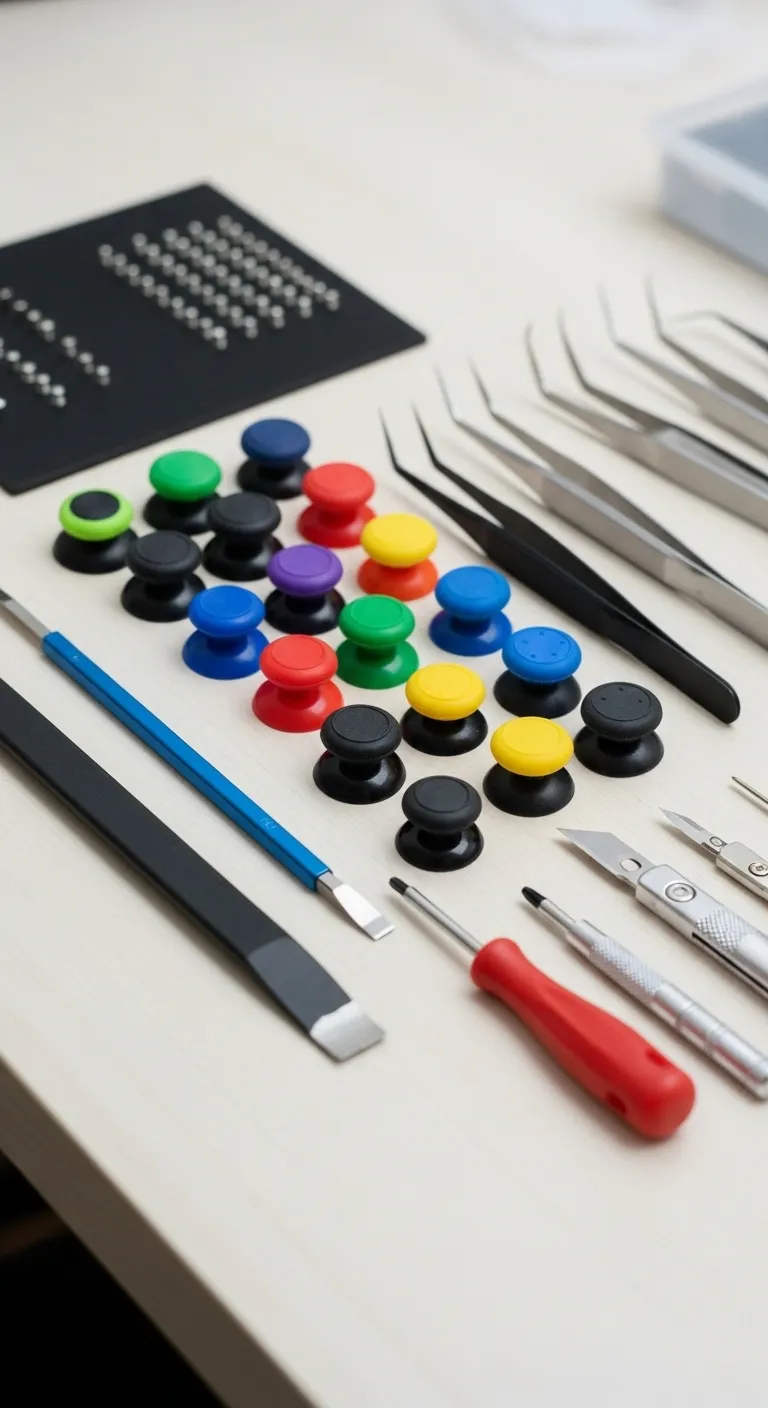
Tools You’ll Need for the Job
Most thumbstick grip replacements require only a few basic tools.
Having these on hand will make the process smooth and prevent any damage to your gamepad.
Here’s a typical loadout:
- Replacement Thumbstick Grips (ensure they are compatible)
- Plastic Pry Tool or Spudger
- Tweezers (optional, for precise placement)
- Isopropyl Alcohol and Cotton Swabs (for cleaning)
“These are wear-and-tear items… They’re not designed to last forever, and we want to get as much life out of them as we possibly can.”– Kyle Wiens, Gaming Bible
Grip wear is often the first sign of aging, but it’s part of a larger picture of analog stick degradation. Issues like stick drift are incredibly common, stemming from the internal components wearing down over time. This highlights how important regular maintenance is.
A bar chart indicating that a survey from Which? found that 40% of PS5 DualSense owners reported experiencing stick drift, a common analog stick issue.
Before you replace the grips, it is a great idea to check the stick’s overall health.
Worn grips can sometimes hide underlying problems. Use a Gamepad Drift Test to ensure your analog sticks are properly calibrated and not showing signs of drift.
If you discover deeper issues, it might be related to the technology inside. Understanding the difference between joystick types can help you in future purchases or repair decisions.
Learning about Hall Effect vs potentiometer joysticks is a great way to level up your hardware knowledge and prevent future stick drift.
Level 1: Quick Fix Grip Covers and Their Trade-offs
If your thumbstick grips are worn down but the stick itself works fine, a cover is your quickest and easiest fix. These are typically silicone or rubber caps that slip right over your existing analog sticks.
Let’s get you back in the game with this simple DIY!
This approach requires no tools and takes mere seconds.
It’s a fantastic way to restore grip, prevent further wear on new controllers, and add a splash of custom color. Many gamers find the added texture improves their control and comfort during long sessions.
Thumbstick Grip Covers: Pros vs. Cons
While grip covers are a great solution, it’s smart to weigh their benefits against their potential downsides. This quick comparison will help you decide if they’re the right choice for your play style and needs.
| Pros | Cons |
|---|---|
| ✅ Incredibly easy to install | ❌ Can occasionally slip or rotate |
| ✅ Very affordable option | ❌ Adds height to the thumbstick |
| ✅ Provides enhanced grip and texture | ❌ May not fit perfectly on all models |
| ✅ Protects original thumbsticks | ❌ Does not fix mechanical issues |
The main trade-off is the change in feel.
The added height can alter your muscle memory slightly.
For some, this is a bonus, offering a wider range of motion. For others, however, it can feel less precise.
High-quality grips also tend to stay put better than cheaper ones.
How to Install Thumbstick Covers
Ready to give them a try? The process is incredibly simple and takes less than a minute. Follow these steps to get your new grips on securely.
- Clean the Thumbstick: Wipe the original thumbstick with a microfiber cloth to remove any oils or dust for a better fit.
- Flip the Cover: Turn the new grip cover completely inside out.
- Position and Place: Align the inverted cover over the top of the analog stick.
- Roll It On: Carefully roll the edges of the cover down and around the thumbstick until it pops into place.
“Grip is essential… It helps you hold onto the controller easier. You’re using less force to hold the controller so you can use that energy to actually play the game.”– Jonas Fikentscher, Product Manager at SCUF Gaming, IGN
Remember, a new grip cover is a cosmetic and ergonomic fix, not a mechanical one.
If your controller is suffering from stick drift, a cover won’t solve it.
Be sure to use our Gamepad Drift Test to check your analog stick’s performance.
Level 2: Swapping Thumbstick Caps for a Fresh Feel
If simple grips aren’t cutting it, replacing the entire thumbstick cap is the next level of DIY repair. This method is more permanent and completely refreshes the feel of your analog sticks, getting rid of that worn-out, slippery plastic for good.
This process requires opening your controller.
While it might sound daunting, it’s a straightforward procedure with the right tools. Let’s get your controller feeling factory-fresh again.
Tools and Materials You’ll Need
Before you start, gather your gear.
Having everything on hand makes the process smooth and prevents any mid-project scrambling.
You won’t need a soldering iron for this, just some basic tools.
- Replacement thumbstick caps (ensure they are compatible with your controller model)
- A plastic pry tool or spudger to open the shell without scratches
- Appropriate screwdrivers (e.g., Phillips #00, Torx T8 Security)
- A small tray to keep screws organized
Step-by-Step Replacement Guide
Ready to swap those sticks? Follow these steps carefully.
The process is very similar for most Xbox, PlayStation, and Nintendo controllers, but screw locations may vary.
- Disassemble the Controller: Remove any batteries. Carefully undo the screws on the back of the controller. Use your plastic pry tool to gently separate the front and back shell pieces.
- Access the Thumbsticks: Once open, you’ll see the main circuit board. The thumbsticks are mounted directly on top of the analog stick modules. You usually don’t need to remove the board for this task.
- Remove Old Caps: Grip the old thumbstick cap firmly and pull it straight up. It should pop off the post of the joystick module with a bit of force. Avoid wiggling it side-to-side too much.
- Install New Caps: Take your new thumbstick cap and align it with the post. Press down firmly until it clicks securely into place. It should feel snug with no wobble.
- Reassemble and Test: Snap the controller shell back together and replace the screws. Don’t overtighten them! Your project is nearly complete.
“It’s not so much an issue of material choice, as it is an issue of the size of the parts… With a bigger component, you have the ability to use more robust parts that will last longer.”– Nick Nunn, Digital Trends
Final Checks for Perfect Performance
After reassembling your controller, it’s critical to test your work. You want to ensure the new sticks have a full range of motion and are not rubbing against the shell.
A detailed diagnostic is the best way to confirm this.
Use our core Gamepad Controller Test to verify everything.
Move the sticks in smooth circles and check that the axis values respond correctly.
This quick test confirms your DIY success and gets you back in the game with confidence.
Level 3: Advanced Full Analog Stick Module Replacement
If simpler fixes haven’t solved severe stick drift or mechanical failures, it’s time for the ultimate repair: replacing the entire analog stick module.
This is an advanced procedure that requires precision and soldering skills.
This repair tackles the root cause of many joystick issues by replacing the internal potentiometers and mechanical parts.
Let’s get your controller’s movement feeling brand new.
This process is complex, so proceed with caution.
Warning: This Repair Requires Soldering
This is not a simple swap. You will be desoldering components from your controller’s main circuit board (PCB) and soldering a new one in place.
An unsteady hand or improper technique can permanently damage your controller. Proceed only if you are confident in your soldering abilities.
Tools and Materials for Module Replacement
Having the right tools is non-negotiable for this task. Here’s what you’ll need to gather before you start disassembly.
| Tool/Material | Purpose |
|---|---|
| Replacement Analog Stick Module | Ensure it’s compatible with your specific controller model. |
| Soldering Iron | A temperature-controlled iron with a fine tip is ideal. |
| Solder | Use lead-free or 60/40 rosin core solder suitable for electronics. |
| Desoldering Pump or Wick | Essential for cleanly removing the old module’s solder. |
| Isopropyl Alcohol & Cotton Swabs | For cleaning the PCB after removing the old component. |
| Precision Screwdriver Set & Prying Tools | For safely opening the controller shell. |
The Step-by-Step Soldering Process
Patience is key. Each controller model has a different layout, but the general process of replacing the module remains the same.
- Disassemble Completely: Carefully open your controller and remove all components necessary to access the back of the main PCB where the analog stick is mounted.
- Locate and Desolder: Identify the 12 to 14 solder points holding the faulty analog module. Heat each joint and use your desoldering pump or wick to remove the old solder.
- Remove the Old Module: Once all points are clear, gently wiggle the old module out. Do not force it. If it’s stuck, you likely need to remove more solder.
- Clean the PCB: Use isopropyl alcohol to clean any remaining flux or residue from the contact points on the board. Ensure the through-holes are clear.
- Install the New Module: Seat the new analog stick module, making sure all its pins go through the holes in the PCB and it sits flush against the board.
- Solder the New Module: Carefully solder each pin to the board, creating clean, solid connections. A good joint should look like a small, shiny cone.
“Apply heat to both the pad and the lead of the component you are soldering at the same time. This is called creating a heat bridge and it helps ensure that the solder will flow evenly around both.”– Kay-Kay, iFixit
Post-Surgery Testing is Crucial
After reassembling your controller, the first thing you must do is test your work.
Plug it in and head straight to our main Gamepad Controller Test tool. Check the axis visualization to confirm the stick moves smoothly to every edge.
Next, use the Gamepad Drift Test to ensure the new module is perfectly centered with no unwanted input.
Consider this an opportunity to upgrade. You could replace a standard stick with a more durable one, which can help you understand the differences between Hall Effect vs potentiometer joysticks.
Fast Facts
- DIY thumbstick grip replacement is an easy, affordable, and universal solution to restore gaming comfort and control on any controller, eliminating the need to buy a new one.
- Basic tools like replacement grips, a plastic pry tool, and cleaning supplies are typically all that’s needed for the job.
- Before replacing grips, it’s crucial to check the overall health of the analog stick for underlying issues like stick drift, and temporary grip covers offer a quick, tool-free fix, though they have trade-offs like added height and potential slippage.
Aftermarket Thumbstick Materials: A Quality Comparison Guide
Choosing the right material for your new thumbstick grips can completely change how your controller feels. Your choice impacts grip, comfort, and durability, so it’s a key part of any DIY replacement.
Let’s break down the most common aftermarket options.
Common Thumbstick Grip Materials
When you’re shopping for replacements, you’ll mainly find three types of materials. Each has its own set of pros and cons that cater to different playstyles and preferences.
Understanding these is the first step to a successful upgrade.
- Silicone: This is a very popular choice for its soft, comfortable feel. Silicone offers excellent grip, even during intense sessions. However, its softness can mean lower durability, and it may wear out faster than other materials.
- Rubber (TPU/TPE): Often used by manufacturers, thermoplastic materials like TPU and TPE offer a great balance. They provide a firm, textured grip and are more durable than silicone. This is a solid choice if you want to restore that “new controller” feel.
- Metal (Aluminum): For ultimate durability, metal grips are unmatched. They will not wear down or tear. The trade-off is a slicker surface with less grip, and some gamers find the cold feel of metal uncomfortable during long sessions.
“The surfaces have to feel good against your skin, even when your hands get sweaty. The textures and materials are a huge part of the experience.”– Carl Ledbetter, former Executive Creative Director for Xbox, Wired
Which Material is Right For You?
The best material really comes down to personal preference.
If you prioritize comfort and maximum grip for fast-paced games, silicone is a great option. For a durable, reliable replacement, rubber is the way to go.
Metal grips are best for gamers who are tough on their gear and want a one-time fix. Once you’ve installed your new grips, be sure to run a full check on our Gamepad Controller Test to ensure your analog stick movement is smooth and unrestricted.
Fast Facts
- Aftermarket thumbstick grips are available in silicone, rubber (TPU/TPE), and metal (aluminum), each impacting grip, comfort, and durability.
- Silicone offers maximum comfort and grip but has lower durability, while metal provides ultimate durability at the expense of grip and a potentially cold feel.
- Rubber (TPU/TPE) materials offer a balanced option, providing good grip and durability, often replicating the feel of a new controller.
Level Up Your Controller Care
You’ve now got the skills to replace worn thumbstick grips! This simple DIY fix brings back that fresh, new-controller feel and gaming precision.
Remember, this is more than just a cosmetic repair. It’s your first step into total controller maintenance. Keep an eye out for deeper issues like stick drift.
So grab your tools, find some compatible grips, and get back to gaming with confidence. Let’s get you back in the game!
Frequently Asked Questions
What’s the difference between grip covers and full replacements?
Grip covers are silicone caps that slip over your thumbsticks. It’s a quick, no-tools fix for worn rubber or to add texture and protection.
Full replacements mean opening the controller to swap the whole plastic stick. This is for when the original thumbstick itself is broken or worn.
Will replacing my thumbstick grips fix stick drift?
Unfortunately, no. Stick drift is an internal problem with the joystick’s sensors. The rubber grip on top has no effect on this common issue.
Replacing the grip only restores traction. To fix drift, you must repair or replace the entire internal analog stick module. Test before you buy!
Are all replacement thumbstick grips universal?
Definitely not. Controllers from Sony, Microsoft, and Nintendo use different thumbstick sizes and shapes. One size does not fit all here!
Always buy grips specifically listed for your controller model (e.g., PS5 DualSense or Xbox Series X) to ensure they will fit correctly.
Technical Glossary
- Analog Stick
- The underlying control component beneath a thumbstick grip that translates physical movement into directional input for a game. It is subject to internal wear and degradation over time.
- Stick Drift
- A common controller issue where an analog stick registers movement even when it is not being touched. This is caused by the internal components wearing down over time.
- Spudger
- A specific type of plastic pry tool used to safely open electronic devices like gamepads without scratching or damaging the casing during repair or maintenance.
- Hall Effect Joysticks
- A type of joystick technology that uses magnetic fields to detect movement, which helps prevent the physical wear and tear that leads to stick drift in other joystick types.
- Potentiometer Joysticks
- A common type of joystick technology that uses mechanical wipers to read the stick’s position. These components can wear down over time, making them a common cause of stick drift.


